
Vue on Django, Part 1
1873 words. Time to Read: About 18 minutes.I did it. It was scary, and hard, and awesome, and I did it. I’ve been making server-side web applications with Django for a little while now, but I’ve watched the shwoopy front-end, javascript-powered, single-page apps tentatively from afar, telling myself that I’ll go through a few tutorials some day. So last week, I said “Screw that noise, I’m building something!” This is not how I traditionally learn anything, and this was the first time that I’ve ever learned something from Level 0 by diving in the deep end. I think it worked surprisingly well, and I wanted to share a tutorial – mostly to help me cement the new ideas I’ve learned into something more stable. So without further ado, here’s my tutorial for making a Vue app powered by a Django REST backend. In the first part, we’ll set up just the Vue side. Part 2 will be the hardest part, setting up the data model. Finally, part 3 will be the Django backend. The tutorial will assume a working knowledge of JavaScript syntax, but I’ll try to explain some of the infrastructure involved. Let’s get to it.
1. OverVue
Vue.js is another in a long line of front-end frameworks designed around a more realtime and pleasant user experience, with live-updating DOM elements and asynchronus server updates behind the scenes that happen without reloading the entire page the whole time. I personally think they took some of the best things from React and Angular and Elm and others and combined them in a nice way. At least, that’s my opinion with exactly one week of front-end framework experience under my belt.
2. Getting Set Up
The way that we’re going to be doing this, we’ll be using Webpack to handle module bundling and more. Since Webpack is still essentially hoodoo sorcery to me, I’ll explain enough to get the job done. The first thing we’ll need is the vue-cli tool. This will make our lives nice by mostly setting up Webpack for us among other things. You will need Node and NPM though.
For those of you more used to Python and Django, NPM is kind of like pip, if pip had some of the abilities of the standard Django manage.py.
$ npm install -g vue-cli
...
$ vue init NdagiStanley/vue-django todoapp
...
We are going to be using a template from Github for our vue project as you can tell from the command. You can see it here. Go through the prompt answering all the questions it asks. When you’re done, you should have a new project folder. We’ll go over most of the stuff inside later, so don’t panic.
$ cd todoapp
$ npm install
At this point, feel free to begin your git repository as well. I’ll leave that to you. Some important things now. main.js is the file where your app is actually instantiated. Vue apps are made up of components composed together to simplify complicated things. We are not about to do complicated things, so no worries. All we want to have is a todo list that you can enter items into and clear entirely. Two actions. The main component is already created and can be found in src/App.vue. We’ll be changing that shortly. First create a directory called components, if it doesn’t already exist, within the src directory. If it already exists, there may be a Hello.vue file. You can delete that.
3. The Components
Our app will be three primary components. 1) The TodoList, which displays each todo. 2) The Todo, which will be the basic unit displayed. 3) The UserInput, which contains the input box and the clear button. Does it need to be that complicated? No. But it will help show some of the functionalities available within Vue. Let’s create our first one. Create src/components/Todo.vue.
// src/components/Todo.vue

<template>
  <p>
    {{ todo.text }}
  </p>
</template>

<script>
export default {
  props: ['todo']
}
</script>
That’s it. There are two main ways to do Vue components: in one file, and with single-component modules. We’re doing this via modules. Each component will contain a template that lays out the HTML structure of the component, a script tag that contains the brains of the component, and optionally, a style tag that contains custom styles local to the component. These components are laid out in a hierarchy, which you’ll see, and parent components can pass data to their children in the form of props, which you have to declare for the component to be able to use them. You can see that in the script tag above. Don’t get too hung up on the export default nonsense. That’s the way that Webpack is handling modules and imports. When the Todo.vue module is imported, the object that it exports will be what is passed (essentially the “soul” of the component). That will hopefully become more clear as we move on. Let’s do the TodoList component so you can see how props are passed.
// src/components/TodoList.vue

<template>
  <div id="todolist">
    <ul>
      <li v-for="todo in todos">
        <todo v-bind:todo="todo" v-bind:id="todo.id">
        </todo>
      </li>
    </ul>
  </div>
</template>

<script>
import Todo from './Todo.vue'

export default {
  components: {
    Todo
  },
  data: function () {
    return {
      todos: [
        { text: 'Learn Vue' },
        { text: 'Do hard things' }
      ]
    }
  }
}
</script>
Some things of note here. You can see the v-for option used in the li element. That tells Vue to loop through every item in the todos variable and create an li element from it. You can see us creating our first custom element: todo. v-bind allows us to send data into the child component as a prop. When you are making a list of items, Vue makes you provide an id for each item so it can keep the list straight and make speedy changes. You can see this component claims the Todo as its child component in the script section by including the components key. Lastly, the data key provides the initialization of the variable todos. Once we get into the data model we can initialize this from actual data as opposed to hard-coding values.
We’re also seeing more of the “module” syntax in the
import Todo from './Todo.vueline. By writing this, the variable Todo is filled with the object that was exported from the Todo.vue file. Similar, but a slightly more controlled import than Python imports, although you can achieve a similar effect by explicitly setting the__all__variable… but I’m getting off-track.
Here’s the UserInput component.
// src/components/UserInput.vue

<template>
  <div id="user-inputs">
    <input v-model="newTodoText" v-on:keyup.enter="createTodo">
    <button v-on:click="clearTodos">
      Clear
    </button>
  </div>
</template>

<script>
export default {
  data: function () {
    return { newTodoText: '' }
  },
  methods: {
    createTodo () {
      console.log(this.newTodoText, 'created!')
    },
    clearTodos () {
      console.log('Todos cleared!')
    }
  }
}
</script>
What’s new here? You can see our first event handlers! The input responds to a keyup.enter event which does what is predictable. You can see the createTodo method declared within the script tag’s method section. Notice again we define a variable in the data section, but this time we’re using v-model, which is syntactic sugar for a two-way bind. Anytime you change the input text, newTodoText gets updated, and anytime you change newTodoText programatically, the text in the input box gets changed.
Almost done. Go ahead and modify the existing App.vue.
// src/App.vue

<template>
  <div id="app">
    <user-input></user-input>
    <todo-list></todo-list>
  </div>
</template>

<script>
import TodoList from './components/TodoList.vue'
import UserInput from './components/UserInput.vue'

export default {
  components: {
    UserInput,
    TodoList
  }
}
</script>
Nothing new to see here. One thing I should note: see how the modules and objects in the script tag are CamelCase? See how the template custom elements are kabob-case? Vue manages that translation automatically since HTML is case-insensitive.
4. Take a Look
Here we go, the moment of truth!
$ npm run dev # This will run the webpack build and development serverHead on over to localhost:8080 and see your handiwork. You should see the following masterpiece of software design:
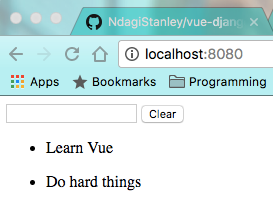
Some possibilities for error: if you see COULD NOT GET /, you should check your terminal. You probably angered the ESLint gods. I had about 7 billion style fails the first time. Fix those and refresh the page. If you see any warning about npm failing, it’s possible you forgot to install the node_modules. Run npm install and try again.
Once you get it working, pull up your browser’s devtools and type in the input and hit enter. You should see it log as your createTodo function commands it to. Click the clear button. You should see a second appropriate log. So ends the first whirlwind part of the tutorial. Next time we’ll get the data store (think Flux/Redux – we’ll be using Vue’s version: Vuex) setup.
As a note, this is my first time really using ES6-type syntax for the front-end, my first time using Vue, Webpack, ESLint, and my first time really using npm scripts and node_modules. If you see any ways that I’m Doing It Wrong™, let me know (gently, please 😁).
Author: Ryan Palo | Tags: vue django es6 tutorial |Like my stuff? Have questions or feedback for me? Want to mentor me or get my help with something? Get in touch! To stay updated, subscribe via RSS