
Learn to Code, Part 2 - Looping Targets
2921 words. Time to Read: About 29 minutes.This is part two in my series on Learning to Code. Check out Part 1 if you missed it. Somehow, my wife is still with me after the first one, so let’s keep at it! I’m going to drop this excerpt from the previous part here, because I think it’s really important to repeat as often as possible.
If you’re just starting to learn to program, let me tell you something. Programming is Hard. So please don’t feel discouraged or stupid. This tutorial moves really fast and covers a lot, so feeling overwhelmed or not understanding everything on the first pass-through is totally normal. My goal here is to take you through the motions and have you experience the thrill programmers feel of creating something dynamic and awesome out of nothing. Once you’re through, ask me every question you can think of until things make more sense. You can email me or send me a Twitter message. Links are in my bio on the about page. I’ll work through the homework with you (since the homework will really help get things solidified some). Just put your head down, get through it, don’t give up, and don’t feel weird asking for help. If something doesn’t make sense, it’s not because you’re a doofus – it’s because I didn’t write well enough. Now. For real this time. Let’s get started
Lesson 2: Looping Targets
Congratulations, you survived Lesson 1! Hopefully you’re hungry for more. In this lesson, we’re going to take what we learned in the previous lesson and cement it in place. We’ll take if statements, assigning variables, and using functions to the next level. I’ll try to mix in a few new cool P5 functions as well. Lastly, we’ll get to see our first loop. This lesson will also work a little different than the previous one in that, instead of getting the final product at the beginning of the project and working through it backwards, we’re going to do what programmers often do, which is build something small and slowly increment it. I will, however, give you a little taste of what is to come.
We’re going to make it so that when you click on the canvas, a randomly sized target gets drawn, with a random number of rings. These rings should go from black on the outside to white in the center, and get darker linearly.
Step 1: Loops (and noLoops)
Let’s get the hard stuff out of the way up front so you have longer to get familiar with it. Here’s our goal for Step 1:
It might not look that different, but we’re removing a lot of our requirements initially. We’re taking a big problem, and we’re breaking it into a few smaller, easier to solve problems. I (and many others) call this “eating an elephant”.
As a programmer, you have to know how to eat elephants. How do you eat an elephant?
One bite at a time, man. One bite at a time.
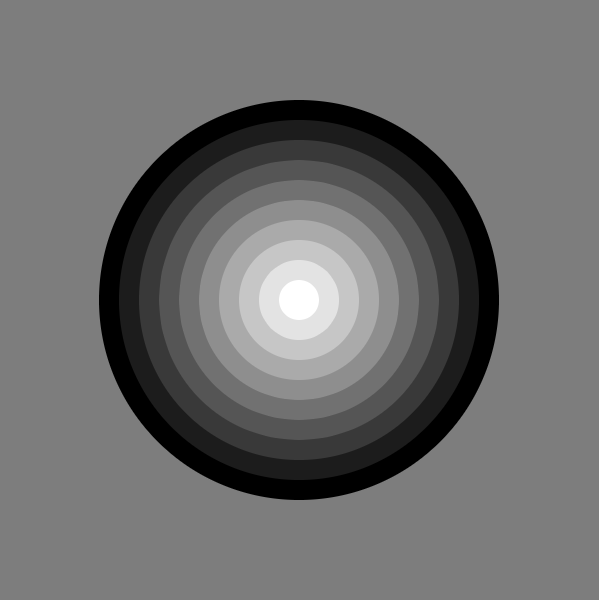
So what are our requirements for Step 1? We must draw a static, unmoving set of 10 circles in the middle of the canvas. The overall diameter must be 400px. The rings must go from white to black, linearly.
Our First Try
Ok, let’s get started with the easy stuff: the setup. We need a canvas, a grayish background, we don’t need our drawing looping, and none of the circles really have outlines.
function setup() {
  createCanvas(600, 600);
  background(125);
  noStroke();
  noLoop();
}
The first two lines should look familiar. We wanted a medium gray background, and remember that our grayscale goes from 0 to 255 by default. 125 falls relatively into the middle of that range. The last two functions need only a little introduction. noStroke turns off the borders, and noLoop makes it so our draw loop doesn’t update. If none of our shapes are moving, we can save some CPU cycles if we tell the canvas not to run draw over and over. You’re welcome, CPU! We love you!
Cool! So canvas: check. Gray background: check. Static, non-moving drawing: check. What’s next? The requirements of the circles. Let’s declare some variables to make our lives easier.
function draw() {
  var maxSize = 400;  // pixels
  var steps = 10;
  var sizeStep = maxSize / steps;  // We'll use this to define our ring sizes
  var colorStep = 255 / steps;
  var centerX = width/2;  // pixels
  var centerY = height/2;  // pixels
}
We covered all of the above in Lesson 1, so no worries there. You might ask, “Ryan, if we’re not using the draw function to loop (because of noLoop), how come we don’t just do everything in the setup function and forget the draw function altogether?” You’re right! You totally could. From what I can tell, the two are functionally equivalent. I chose to do things this way because it makes more sense in my head to only do “setup-ish” things in setup and “drawing” things in draw. Whatever floats your boat. You’re the artist here!
OK, it’s finally time to create our circles. Luckily, P5 provides us with the ellipse function, which takes an x, y, x width and y height. Since we are geometry geniuses, we know that if we draw an ellipse whose width and height are the same, it’s the same as drawing a circle.
function draw() {
  var maxSize = 400;  // pixels
  var steps = 10;
  var sizeStep = maxSize / steps;  // We'll use this to define our ring sizes
  var colorStep = 255 / steps;
  var centerX = width/2;  // pixels
  var centerY = height/2;  // pixels

  // Draw the circles, start with the biggest, black one on bottom
  fill(0);
  ellipse(centerX, centerY, maxSize, maxSize);
  fill(1 * colorStep);
  ellipse(centerX, centerY, maxSize - 1*sizeStep, maxSize - 1*sizeStep);
  fill(2 * colorStep);
  ellipse(centerX, centerY, maxSize - 2*sizeStep, maxSize - 2*sizeStep);
  fill(3 * colorStep);
  ellipse(centerX, centerY, maxSize - 3*sizeStep, maxSize - 3*sizeStep);
  // oy vey...  Getting tired of typing yet?
  // ...
}
Nope. I refuse to let you copy paste all that code. We’re learning about the for loop.
For Loops
Try this in your console:
for (var i=0; i < 10; i++) {
  console.log(i);
  console.log('Yeeeeeeaaaaaahhhhh boooyyyyyyyy');
}
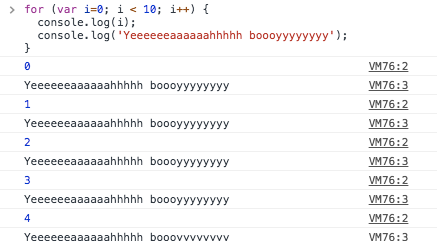
Let’s break it down now. This was a for loop. Now you can see why they’re called that. We’re saying “for each time through this loop, perform the following actions”. There are three main parts of a for loop. The initialization step, the test step, and the incrementing step.
The initialization step is the first section you come to:
var i=0;
Everything here gets run once at the start of the loop. Generally you’re just setting the initial looping variable value, but you can do whatever you want here.
Next is the test step. This runs before every loop. If the test step is true, the loop continues on.
i < 10;
The first time the computer reads the code, we will have just set i = 0, so — 0 being less than 10 — the loop activates, running everything inside.
After that happens comes the incrementing step.
i++
We saw this in Lesson 1 when we were stepping our walker over one pixel. This simply increases i by 1. Then, we loop back to the test step. Now, i is equal to 1, which is still less than 10, so the loop happens again. And again and again until after i equals 9. After that last loop, i is 10, which is not less than 10. Satisfied, the loop exits and we can continue on with our program. Are you beginning to see how we can use this in our program?
Our Second Try
function setup() {
  createCanvas(600, 600);
  background(125);
  noStroke();
  noLoop();
}

function draw() {
  var maxSize = 400;  // pixels
  var steps = 10;
  var sizeStep = maxSize / steps;  // We'll use this to define our ring sizes
  var colorStep = 255 / steps;
  var x = width/2;  // pixels
  var y = height/2;  // pixels

  // The new stuff!
  for (var i=0; i<steps; i++) {
    fill(i * colorStep);  // 0, 25.5, 50.0, 75.5 ...
    var thisSize = maxSize - (i * sizeStep);  // 400, 360, 320 ...
    ellipse(x, y, thisSize, thisSize);
  }
}
Make sense? First the loop goes through with i === 0. Thus, we call fill(0) and our fill is black. thisSize gets set to 400 - 0 * 40, and our largest circle is 400. And we draw a circle. The next time through, i === 1, so we call fill(25.5) and thisSize === 400 - 1 * 40 === 360, and so forth!
Only one problem, a problem that has plagued programmers since the dawn of programs. The off-by-one error. Note that in the last iteration of the loop, i will be equal to 9. Thus, the fill color will be 9 * 25.5 which is only 229.5! Not 255 like we want. Our center dot is off-white! The humanity! The problem stems from the fact that we have 10 rings, but the first one starts at zero. We’re only really stepping nine times. Thus, we need to fix our colorStep.
var colorStep = 255/(steps - 1);
// now our fill will be 0, 28.33, 56.66, 85 ... 255
The same issue affects our sizeStep, but in that case, we want that to happen. We want our last circle to have a diameter of 40px, not 0px. If we did want 0px to be our stopping point, we would have to make the last adjustment there as well.
Off-by-one errors are super confusing to get your head around and one of the most common causes of errors, so don’t worry if this was a bit dense and confusing. If you have any questions, hit me up and I’ll see what I can do to clarify. But for now, we’re moving on! ONWARDS!
Step 2: Mouse Clicks and Functions
Now that we’ve achieved our first milestone goals, let’s step up the complexity a bit to try to get closer to our final goal. For this step, we want to draw a target 400px large with 10 rings, — same as before — but we want to draw it only when the user clicks on the canvas, and we want to place it where the user clicks on the canvas. Two new goals.
The Mouse Functions/Variables
P5 provides us with a function called mouseClicked function. This function gets called whenever your mouse clicks the canvas. P5 also provides us with two built-in variables mouseY and mouseX. You get three guesses for what these contain. Let’s take our previous sketch and tweak it a little to see what we’re talking about.
// This stuff is all the same as before

function setup() {
  createCanvas(600, 600);
  background(125);
  noStroke();
  noLoop();
}

function draw() {
  var maxSize = 400;  // pixels
  var steps = 10;
  var sizeStep = maxSize / steps;  // We'll use this to define our ring sizes
  var colorStep = 255/(steps - 1);
  var x = width/2;  // pixels
  var y = height/2;  // pixels
  for (var i=0; i<steps; i++) {
    fill(i * colorStep);
    var thisSize = maxSize - (i * sizeStep);
    ellipse(x, y, thisSize, thisSize);
  }
}

// Here is the new hotness

function mouseClicked() {
  fill(255);
  ellipse(mouseX, mouseY, 50, 50);
}
Try it out!
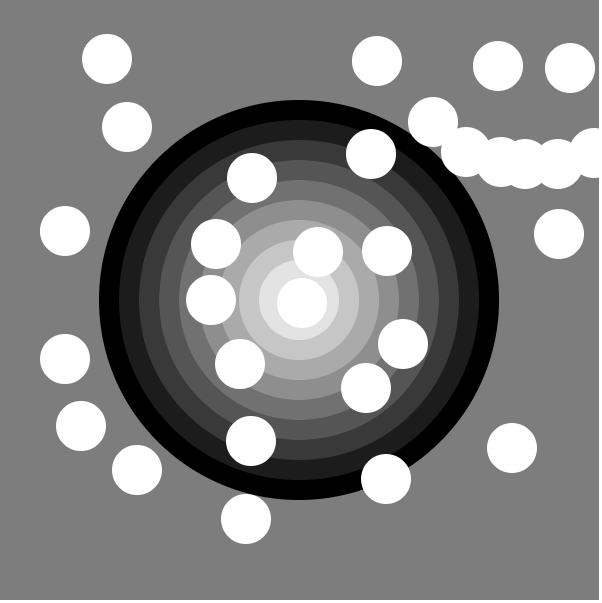
I think you can see where I’m going with this.
Review of Functions
But first, I’m going to do a little cleanup (also known as a refactor) that will make our life marginally easier and, more importantly, help us to review functions. Let’s pull our target drawing out of the draw loop and put it in a function called createTarget.
// ...
function draw() {
  createTarget();
}

function createTarget() {
  var maxSize = 400;  // pixels
  var steps = 10;
  var sizeStep = maxSize / steps;  // We'll use this to define our ring sizes
  var colorStep = 255/(steps - 1);
  var x = width/2;  // pixels
  var y = height/2;  // pixels
  for (var i=0; i<steps; i++) {
    fill(i * colorStep);
    var thisSize = maxSize - (i * sizeStep);
    ellipse(x, y, thisSize, thisSize);
  }
}
See? Nothing too much different. But let’s do one better. Let’s make the target customizable via parameters. Remember them? Those are the function inputs that you put inside the parenthesis. Luckily, we have our inputs all stacked at the top of the function so they are easy to spot.
// ...
function draw() {
  createTarget(width/2, height/2, 400, 10);
}

function createTarget(x, y, maxSize, steps) {
  // calculate what we need from our inputs
  var sizeStep = maxSize / steps;
  var colorStep = 255 / (steps - 1);

  for (var i=0; i<steps; i++) {
    fill(i * colorStep);
    var thisSize = maxSize - (i * sizeStep);
    ellipse(x, y, thisSize, thisSize);
  }
}
Refresh the page, and nothing changes! Great! That’s when you know you’ve had a successful refactor. So why did we do this? Because it makes it really easy to do this:
function draw() {
  createTarget(width/2, height/2, 400, 10);
  createTarget(100, 400, 200, 5);
  createTarget(400, 400, 300, 6);
}
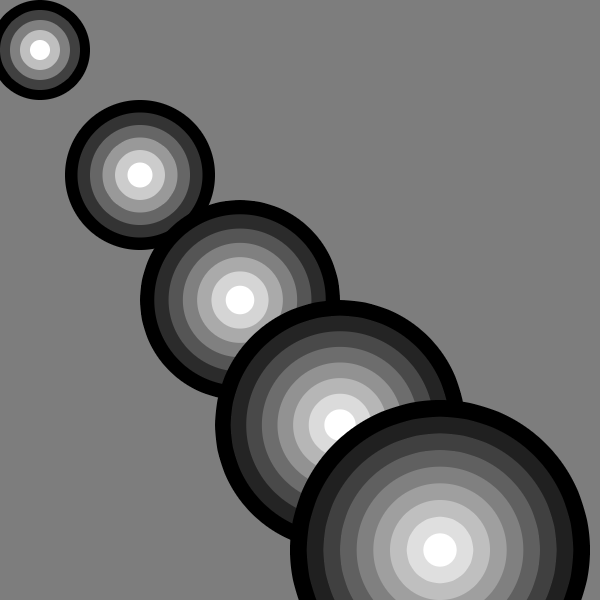
Or even:
function draw() {
  for (var i=0; i < 5; i++) {
    createTarget(40 + i*100, 50 + i*125, 100 + i*50, 5 + i);
    // Get it?
    // x = 40, 140, 240, 340, 440
    // y = 50, 175, 300, 425, 550
    // maxSize = 100, 150, 200, 250, 300
    // steps = 5, 6, 7, 8, 9
  }
}
To try to clarify what’s happening in a function, I’ll try to explain it another way, that helped me. When you first define a function, the things you put into parenthesis are like a recipe. You’re saying what you expect. Similar to a recipe book saying: get some kind of meat and some kind of vegetable.
function iAmTheBest(x, y, r) {
    // ...
}
Then, when you actually call the function, it’s like you’re actually making the recipe.
function draw() {
  iAmTheBest(25, 30, 50);
}
The function looks at the things you’ve passed in and goes, “OK. I’m going to do this with x = 25, y = 30, and r = 50.” To carry on with the strained recipe metaphor, it’s like you read the recipe and you start cooking with beef and broccoli, but following the steps in the recipe with those options. If you use beef and broccoli, it’ll be similar to but not exactly the same as if you were to use chicken and carrots. Have I beat this metaphor to death successfully?
Finishing Up Step 2
Great. Let’s wrap up this Step by completing our objectives.
function setup() {
  createCanvas(600, 600);
  background(125);
  noStroke();
  noLoop();
}

function draw() {
  // nothing in here anymore!
}

function mouseClicked() {
  createTarget(mouseX, mouseY, 400, 10);
}

function createTarget(x, y, maxSize, steps) {
  var sizeStep = maxSize / steps;
  var colorStep = 255/(steps - 1);
  for (var i=0; i<steps; i++) {
    fill(i * colorStep);
    var thisSize = maxSize - (i * sizeStep);
    ellipse(x, y, thisSize, thisSize);
  }
}

Step 3: Adding Randomness
If you remember our initial goal:
We’re going to make it so that when you click on the canvas, a randomly sized target gets drawn, with a random number of rings. These rings should go from black on the outside to white in the center, and get darker linearly.
You’ll notice that we’re pretty much all the way there! We just need to add randomness. Let’s make a new function to handle this extra complexity. Thanks to our createTarget function, this new function should be relatively straightforward.
function createRandomTarget(x, y) {
  var maxSize = random(25, 350);
  var steps = random(1, 10);
  createTarget(x, y, maxSize, steps);
}
Finally, let’s use that in our mouseClicked function instead.
function mouseClicked() {
  createRandomTarget(mouseX, mouseY);
}
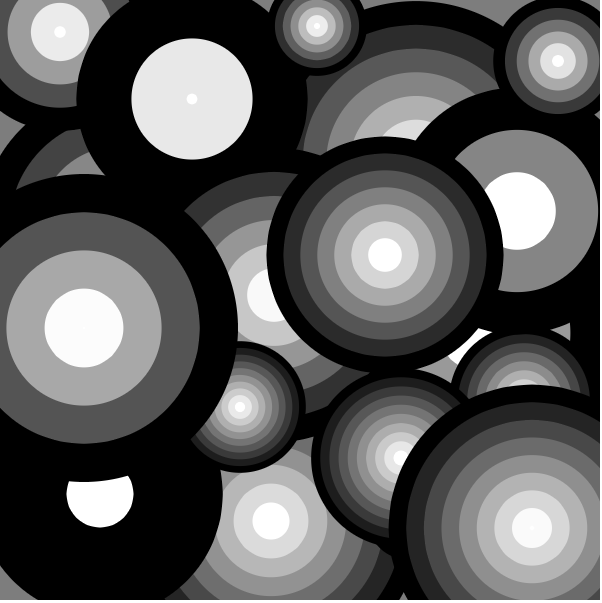
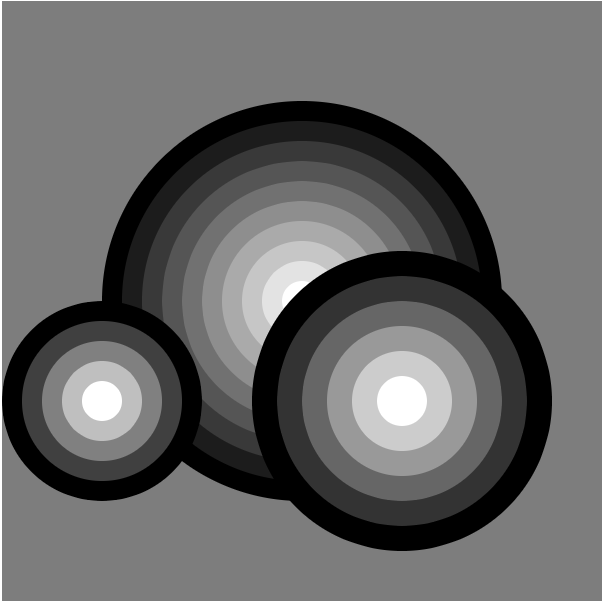
SHABLAM! CIRCLES GALORE.

Not too shabby huh?
Homework
- Go back to your Random Walker. Make it so that when you click on the screen, it clears the screen and he resets in the center of the canvas.
- Do #1, but make it so he starts wherever you click the mouse.
- Make a random walker that is not a
point, but a target! - Update your target function to use colors. BONUS: make it a rainbow.
- Figure out how to make your target rectangular/square instead of a circle.
As before, I’m super dooper available to answer any questions you might have. Let me know what went well, and let me know what I could have explained better. Additionally, let me know how this lesson compared to the last lesson! Was this progressive building approach better than seeing the project up front like last time? Did you like getting the hard stuff (for loops) at the beginning and having the difficulty relax a little after that? Maybe you thought loops were easier than the last sections! I’d love to hear from you.
Author: Ryan Palo | Tags: p5 javascript beginner tutorial |Like my stuff? Have questions or feedback for me? Want to mentor me or get my help with something? Get in touch! To stay updated, subscribe via RSS