Add Search to Your Static Site with Vue
1512 words. Time to Read: About 15 minutes.In the last update to my blog, I changed a few things, but one of the main ones was that I added a search bar to my list of posts to help people find topics that they were interested in. I looked at a few solutions, but since I was already a little familiar with Vue, I decided to go with that. So let’s get into it!
The Goal
The goal of this project is to start with a static site, generated by some static site generator (in my case, Jekyll). I’ll show the relevant HTML that will be our starting point. We will then add search functionality to the Posts page, adding an input that, when typed into, will filter the results on the page, but without a page refresh. Our goal is to get this done relatively simply. JavaScript not being my native ecosystem, I want to try to avoid the complexity, setup, and disk space required to use build tools. All of the code for my blog is open-source (insofar as the source is out in the open, on GitHub, for anyone to see), so if you want to follow along or cheat ahead and see the final code, you can check out the repo. There’s probably some polishing that could be done on it, but that’s not what we’re talking about right now.
0. The Starting Point
Here’s what we’ve got when starting. You can assume that the main layout is in _layouts/page.html and everything that goes here just provides the contents for the posts page.
---
layout: page
title: All Posts
permalink: /posts/
description: A list of all of my blog posts
---

<!-- posts.html -->

<ul>
    {% for post in site.posts %}
        <li class="post">
            {% include post.html post=post %}
        </li>
    {% endfor %}
</ul>
You can see that there’s nothing exceedingly fancy here: an unordered list generated by looping through all the posts using liquid syntax. It includes a snippet for each post. Here is _includes/post.html.
<!-- _includes/post.html -->

<a class="post-title" href="{{ include.post.url }}">{{ include.post.title }}</a><br>
<small>{{ include.post.date | date: "%B %d, %Y" }}</small>

{% if include.post.cover_image %}
    <img class="img-small" alt="Cover image for {{ include.post.title }}" src="/img/{{ include.post.cover_image }}">
{% endif %}

<small>Tags:
{% for tag in include.post.tags %}
    {{ tag }}
{% endfor %}
</small>
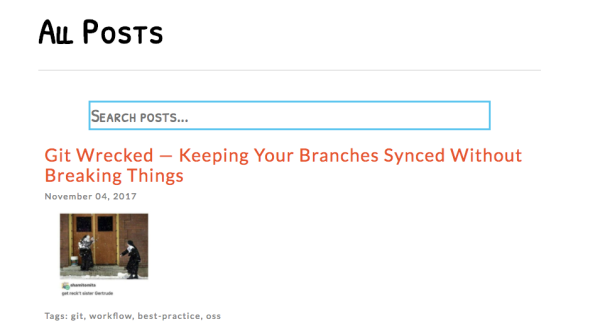
I broke my posts out in a component-like manner. This snippet takes a post object and builds a listing, using its title, url, creation date, cover image (if available), and finally, its list of tags. It ends up looking like this:
That’s what we’re starting with. Next we’ll add our dependency.
1. Adding Vue
Adding Vue will really only be one step long. If you Google for Vue CDN, you’ll find this: https://cdn.jsdelivr.net/npm/vue. Let’s add this to the bottom of our posts.html page, and that’s it!
---
layout: page
title: All Posts
permalink: /posts/
description: A list of all of my blog posts
---

<!-- posts.html -->

<ul>
    {% for post in site.posts %}
        <li class="post">
            {% include post.html post=post %}
        </li>
    {% endfor %}
</ul>
<script src="https://cdn.jsdelivr.net/npm/vue"></script>
2. Getting the Posts Data
If we’re going to have Vue display our posts, we’re going to have to have a list of posts somewhere that Vue can see it (i.e. in JavaScript). There are a couple of ways to do this. We could generate a JSON file and read it in with JavaScript, we could generate it right into a JavaScript variable inside script tags, or we could generate it into a variable in a file. There’s probably more ways, I went with putting it into its own JavaScript file. Keep in mind that this file gets generated at Jekyll Build time, so the source isn’t going to be super pretty, and we’ll need the triple-dash YAML header lines to tell Jekyll to build it.
---
---
// js/posts_data.js

const posts = [
  {% for post in site.posts %}
    {
      title: "{{ post.title | escape }}",
      url: "{{ site.baseurl }}{{ post.url }}",
      cover: "/img/{{ post.cover_image }}",
      tags: "{{ post.tags | join: ', ' }}",
      date: "{{ post.date | date: '%B %d, %Y' }}",
      description: "{{ post.description | strip_html | strip_newlines | escape }}"
    } {% unless forloop.last %},{% endunless %}
  {% endfor %}
];
We’ve created one variable that holds a list of our posts and all their relative information. I’m not sure if it was really necessary to add the unless section around the comma, but that part makes it so that every post has a comma after it except the last one in the list. This file will vary if you’re using another static site generator with a different templating language. Let’s add that script to our script tags.
---
layout: page
title: All Posts
permalink: /posts/
description: A list of all of my blog posts
---

<!-- posts.html -->

<ul>
    {% for post in site.posts %}
        <li class="post">
            {% include post.html post=post %}
        </li>
    {% endfor %}
</ul>
<script src="https://cdn.jsdelivr.net/npm/vue"></script>
<script src="/js/posts_data.js"></script>
Now we’re ready for the fun part.
3. Building the Search/Results Page
It’s time to setup our HTML. Replace the contents of posts.html with this:
---
layout: page
title: All Posts
permalink: /posts/
description: A list of all of my blog posts
---
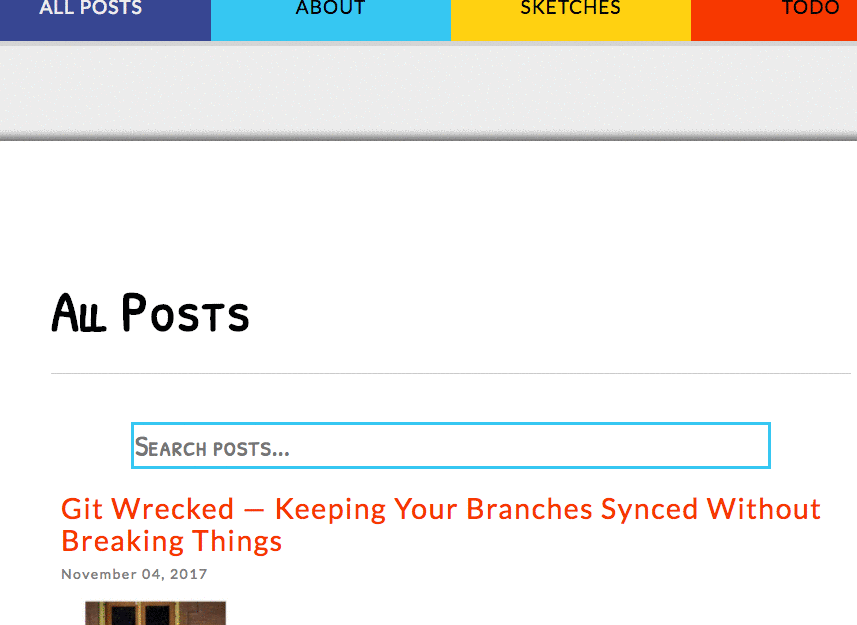
{% raw %}
<div id="app">
<div class="search-wrapper">
<input class="search" type="text" name="search" v-model="search" placeholder="Search posts...">
</div>
<div class="results-wrapper">
<div class="post" v-for="post in filteredPosts">
<a class="post-title" v-bind:href="post.url">{{ post.title }}</a><br>
<small>{{ post.date }}</small>
<img class="img-small" alt="Cover image" v-bind:src="post.cover" v-if="post.cover">
<small>Tags: {{ post.tags }}</small>
</div>
</div>
</div>
{% endraw %}
<script src="https://cdn.jsdelivr.net/npm/vue"></script>
<script src="/js/posts_data.js"></script>
We have to add the raw tag because Vue coincidentally uses the same templating brackets that Jekyll does. We create one div element to hold our app. Inside of that lives our search input box and our results. The contents of the results div should look familiar, since they were ported from our old _includes/post.html. There are some Vue-specific things I want to cover.
<input ... v-model="search">: The v-model directive is a way of setting a 2-way binding in Vue. When we write our App component, we’ll have a search variable available to us. Whenever the search variable gets updated in JavaScript, the input will update, and vice versa too.
<div class="post" v-for="post in filteredPosts">: This directive tells Vue to loop through our posts and repeat the HTML inside for each post.
<a ... v-bind:href="post.title">: The v-bind directive is used to attach an HTML attribute directly to a JavaScript variable, since Vue template brackets won’t work inside HTML attributes. You’ll see that we do the same thing again down at <img ... v-bind:src="post.cover">.
Otherwise, we’re just referring to the attributes that we provided to our posts in posts_data.js! Almost done!
4. Creating the App Component
Time for some Vue JavaScript. Create a file called js/posts.js.
const app = new Vue({
  el: '#app',
  data: {
    search: '',
    post_list: posts
  },
  computed: {
    filteredPosts() {
      return this.post_list.filter( post => {
        return `${post.tags} ${post.title}`.toLowerCase().includes(this.search.toLowerCase());
      });
    }
  }
});
Let’s talk about what’s here:
el: '#app': We tell Vue to place this component in the <div id="app">
data: Here we create two variables — search is one that we saw in posts.html when we used the v-model directive. Note that we give it an initial starting value of an empty string. If we were to put anything here, that’s what text would show up in our search box when the page loaded.
filteredPosts():Vue uses computed to describe data that will need constantly recalculated based on variables. Computed functions are read-only. We’re using it to display a list of posts where either the title or tags match the text in the search box. Anytime the search box gets changed, filteredPosts gets recalculated. Since we’re referencing filteredPosts in our Vue HTML, anytime filteredPosts gets recalculated, the posts on the screen will get re-evaluated and redrawn as needed.
One last thing to do is to add this script to our posts.html.
// ...

<script src="https://cdn.jsdelivr.net/npm/vue"></script>
<script src="/js/posts_data.js"></script>
<script src="/js/posts.js"></script>
And that’s it! We’re done!

5. Bonus JavaScript
As an added bonus, I added these few lines to the end of my posts.js:
document.querySelector('.search').addEventListener('focus', function () {
  window.scroll({
    top: this.offsetTop - 100,
    left: 0,
    behavior: 'smooth'
  });
});
Anytime somebody clicks into the search box (or touches into it on mobile), it raises the search bar up towards the top of the screen so it’s easier to see the available posts changing.
Wrap Up
That’s all! A few file changes, less than 100 lines of code, and no build tools or node_modules, and our site — well, currently just my site — is looking snazzy. Now yours can too! Let me know how it goes or if you run into problems, or if there are ways I can improve my setup. Thanks for reading!
Like my stuff? Have questions or feedback for me? Want to mentor me or get my help with something? Get in touch! To stay updated, subscribe via RSS