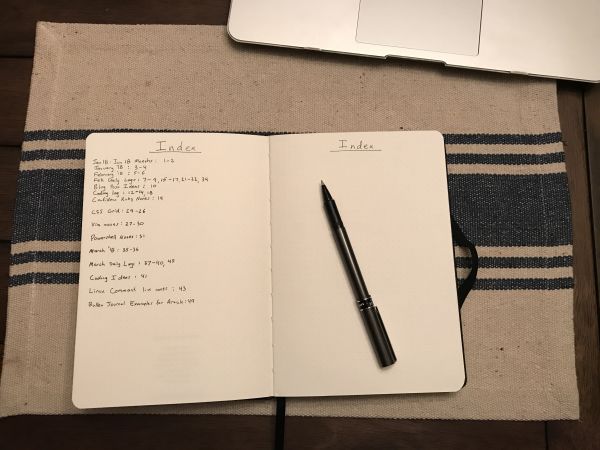
Get on the Bullet Journaling Train
2259 words. Time to Read: About 22 minutes.In early February, I learned about bullet journaling. After trying it for a couple of months and loving it, I wanted to share an introduction and my own personal modifications and tips.
Bullet Journaling: What is It?
Fundamentally, Bullet Journaling is just a structured way to keep track of your thoughts efficiently, without putting an extra unnecessary load on your life to do it. The bullet journal understands that you are busy, and you don’t always have time to sit down and pour out your deepest thoughts and feelings. “Dear diary…” Instead, you condense your thoughts down into small, bite-sized chunks and phrases, the most fundamental of which is the “bullet.”

This humble dot signifies a task or something with an action item. We’ll discuss more about the specifics in a minute. I want to finish up my high-level overview first.
There are a few main strategies that we’ll cover.
- What You Need
- The Index
- The Long View
- The Month View
- The Daily Log
- The List/Notes Page
- Threading
- Different Types of Bullets
- Migrating and Scheduling
Following these topics, I’ll finish up with some mindset tips and things I’ve learned.
Bullet Journaling: How to Do It
1. What You Need
You can really use any medium that you can record information on, paper or digital. However, I prefer using a nice, hard-bound notebook with at least one attached bookmark. I also like to use pretty thick paper with graph lines or a dot matrix on it. If it has a slightly yellow tint, even better. I bought this oneand I love it. I also highly recommend you get a really nice pen. Like, at least a five dollar pen. I find that it adds to the meditative effect of bullet journaling if my tools make me feel like a scholar. 😀 Since my notebook has a little pocket flap in the back, I like to keep a small ruler in there in case I want to make any really straight lines.
Now that you have your tools, let’s get started.
2. The Index
The Index is what keeps your whole journal tied together and allows you to take notes whenever you need without stressing out about how many pages to give yourself. Open up your notebook to the first full blank spread. Label these two pages and the next two with the word “Index.”
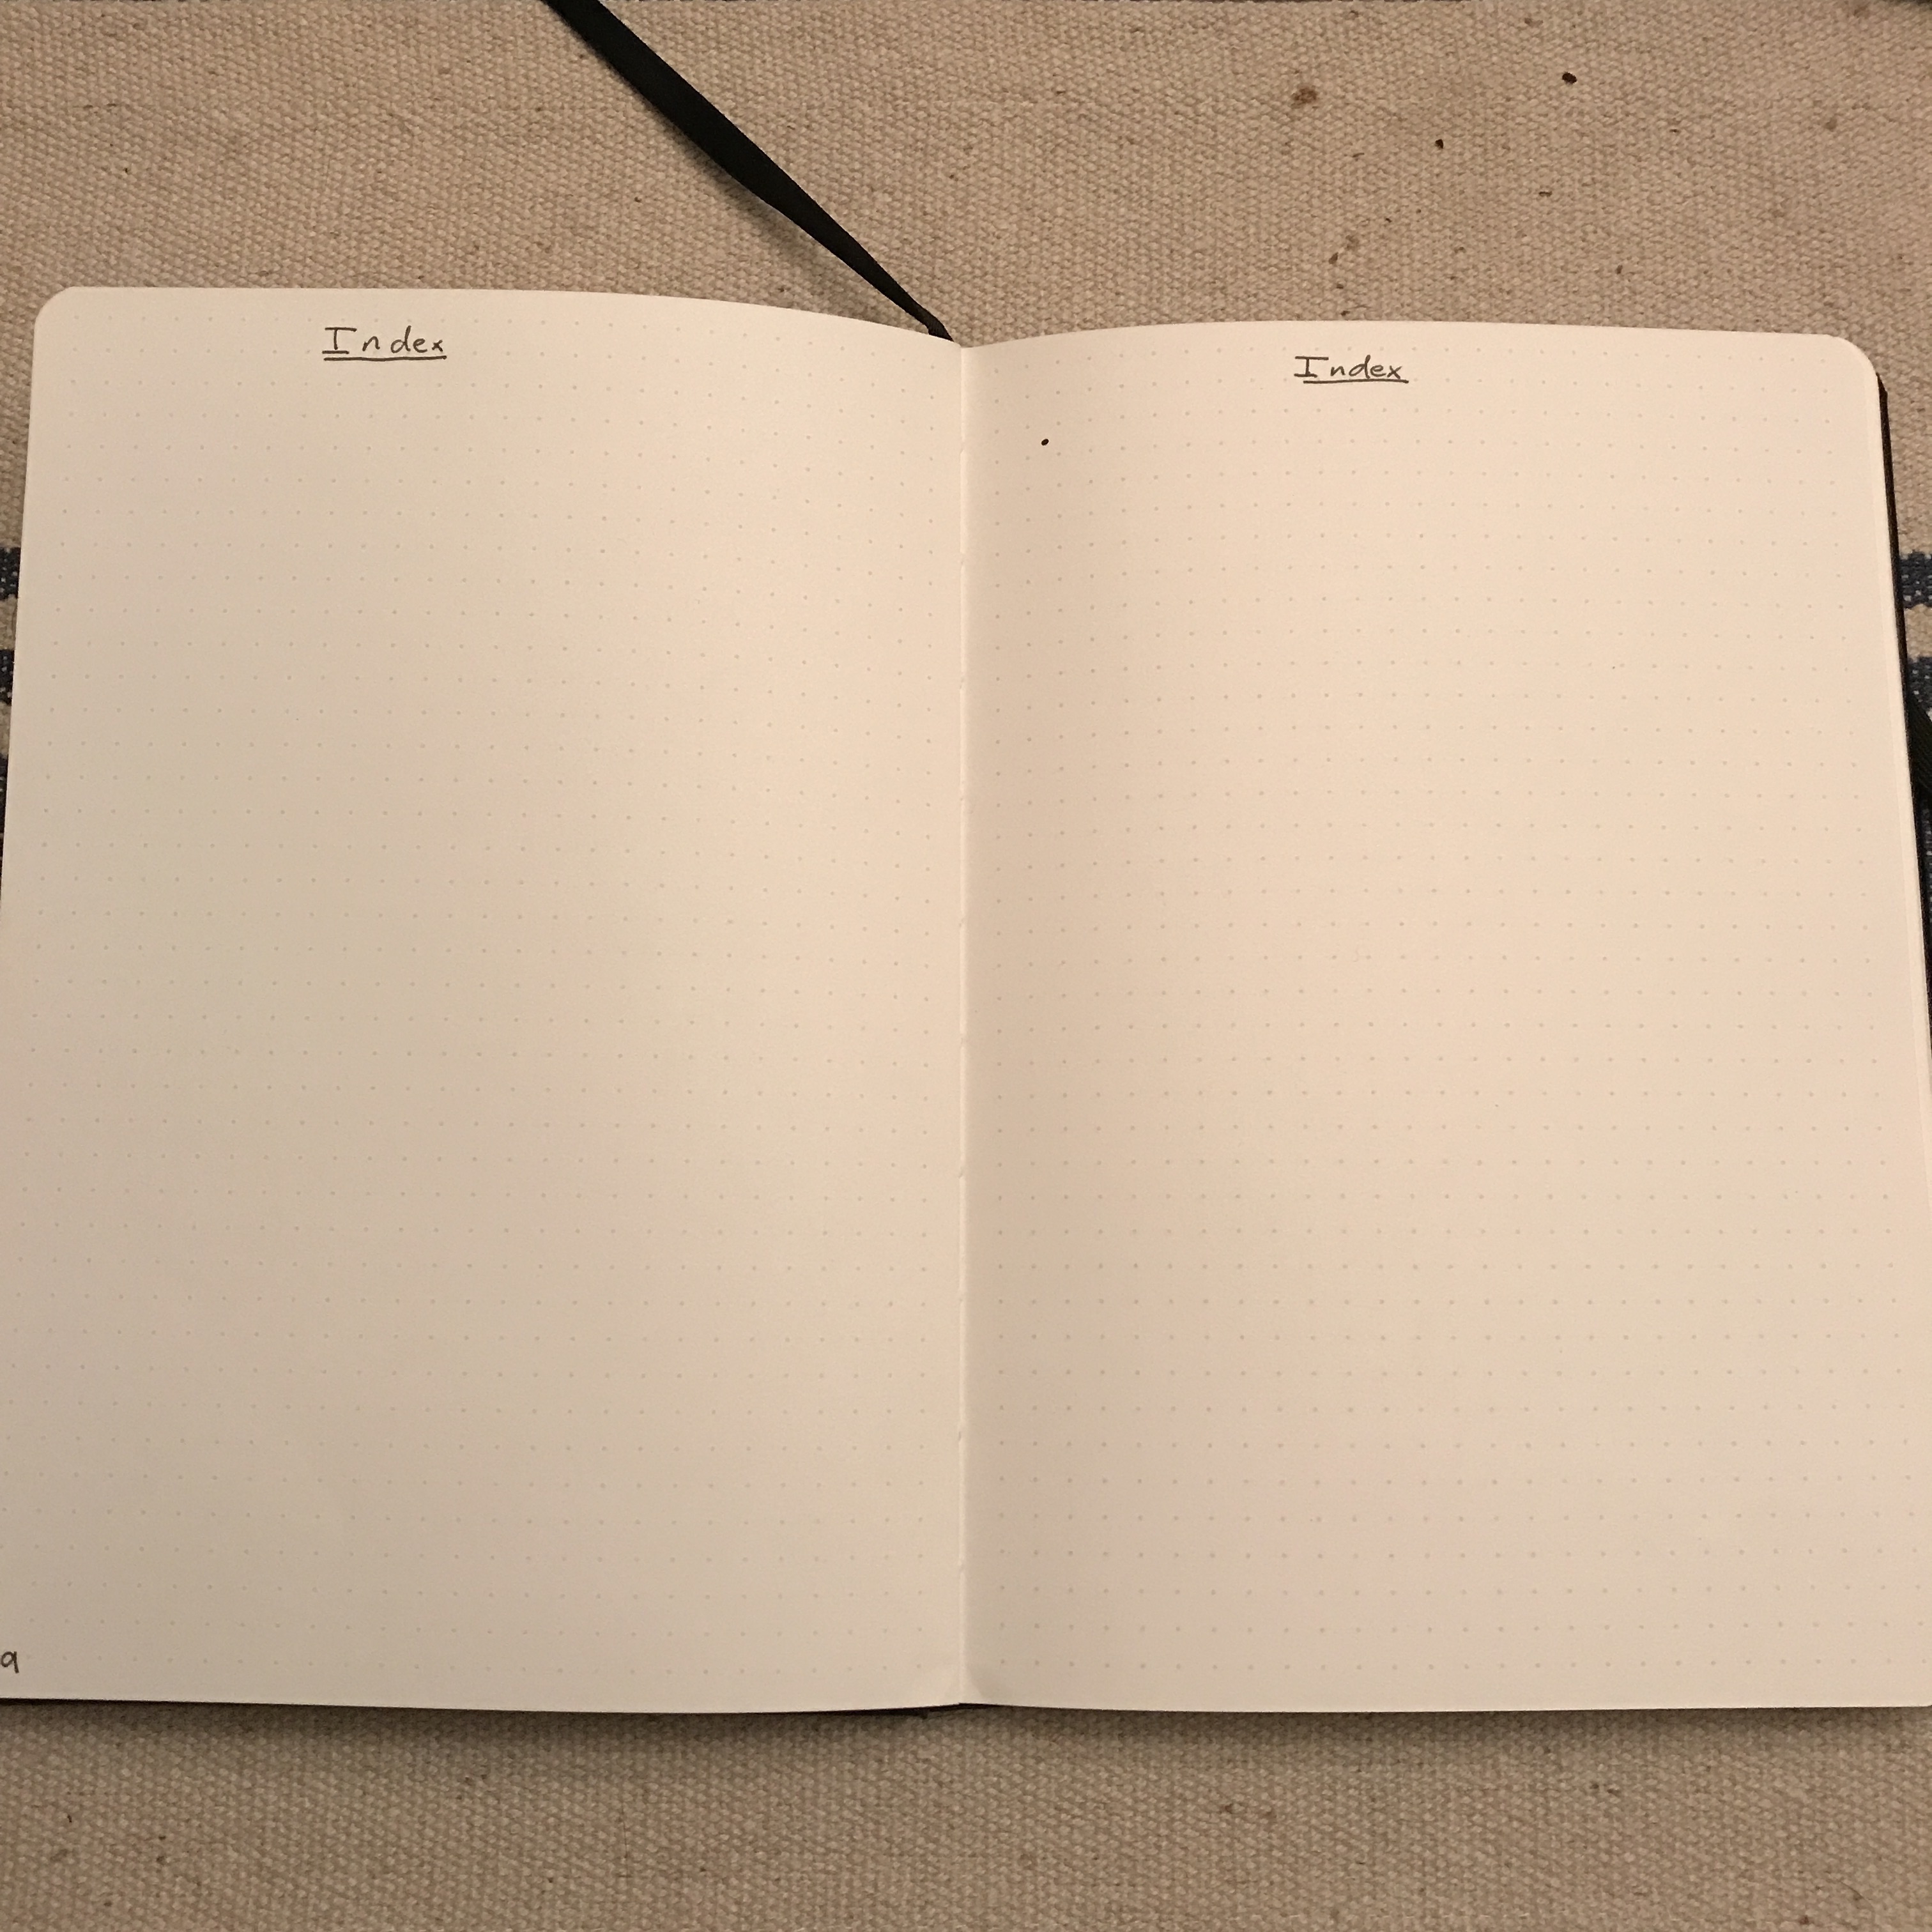
Also, in the bottom outside corner of each of these four pages, number the pages (1, 2, 3, and 4). This index will tell you where in your journal different sections start and end. Since there is nothing in our journal yet, our index is blank. We’ll fill it in some as we add some of the next sections. The main thing is to know that as we add sections, they’ll end up looking like this:
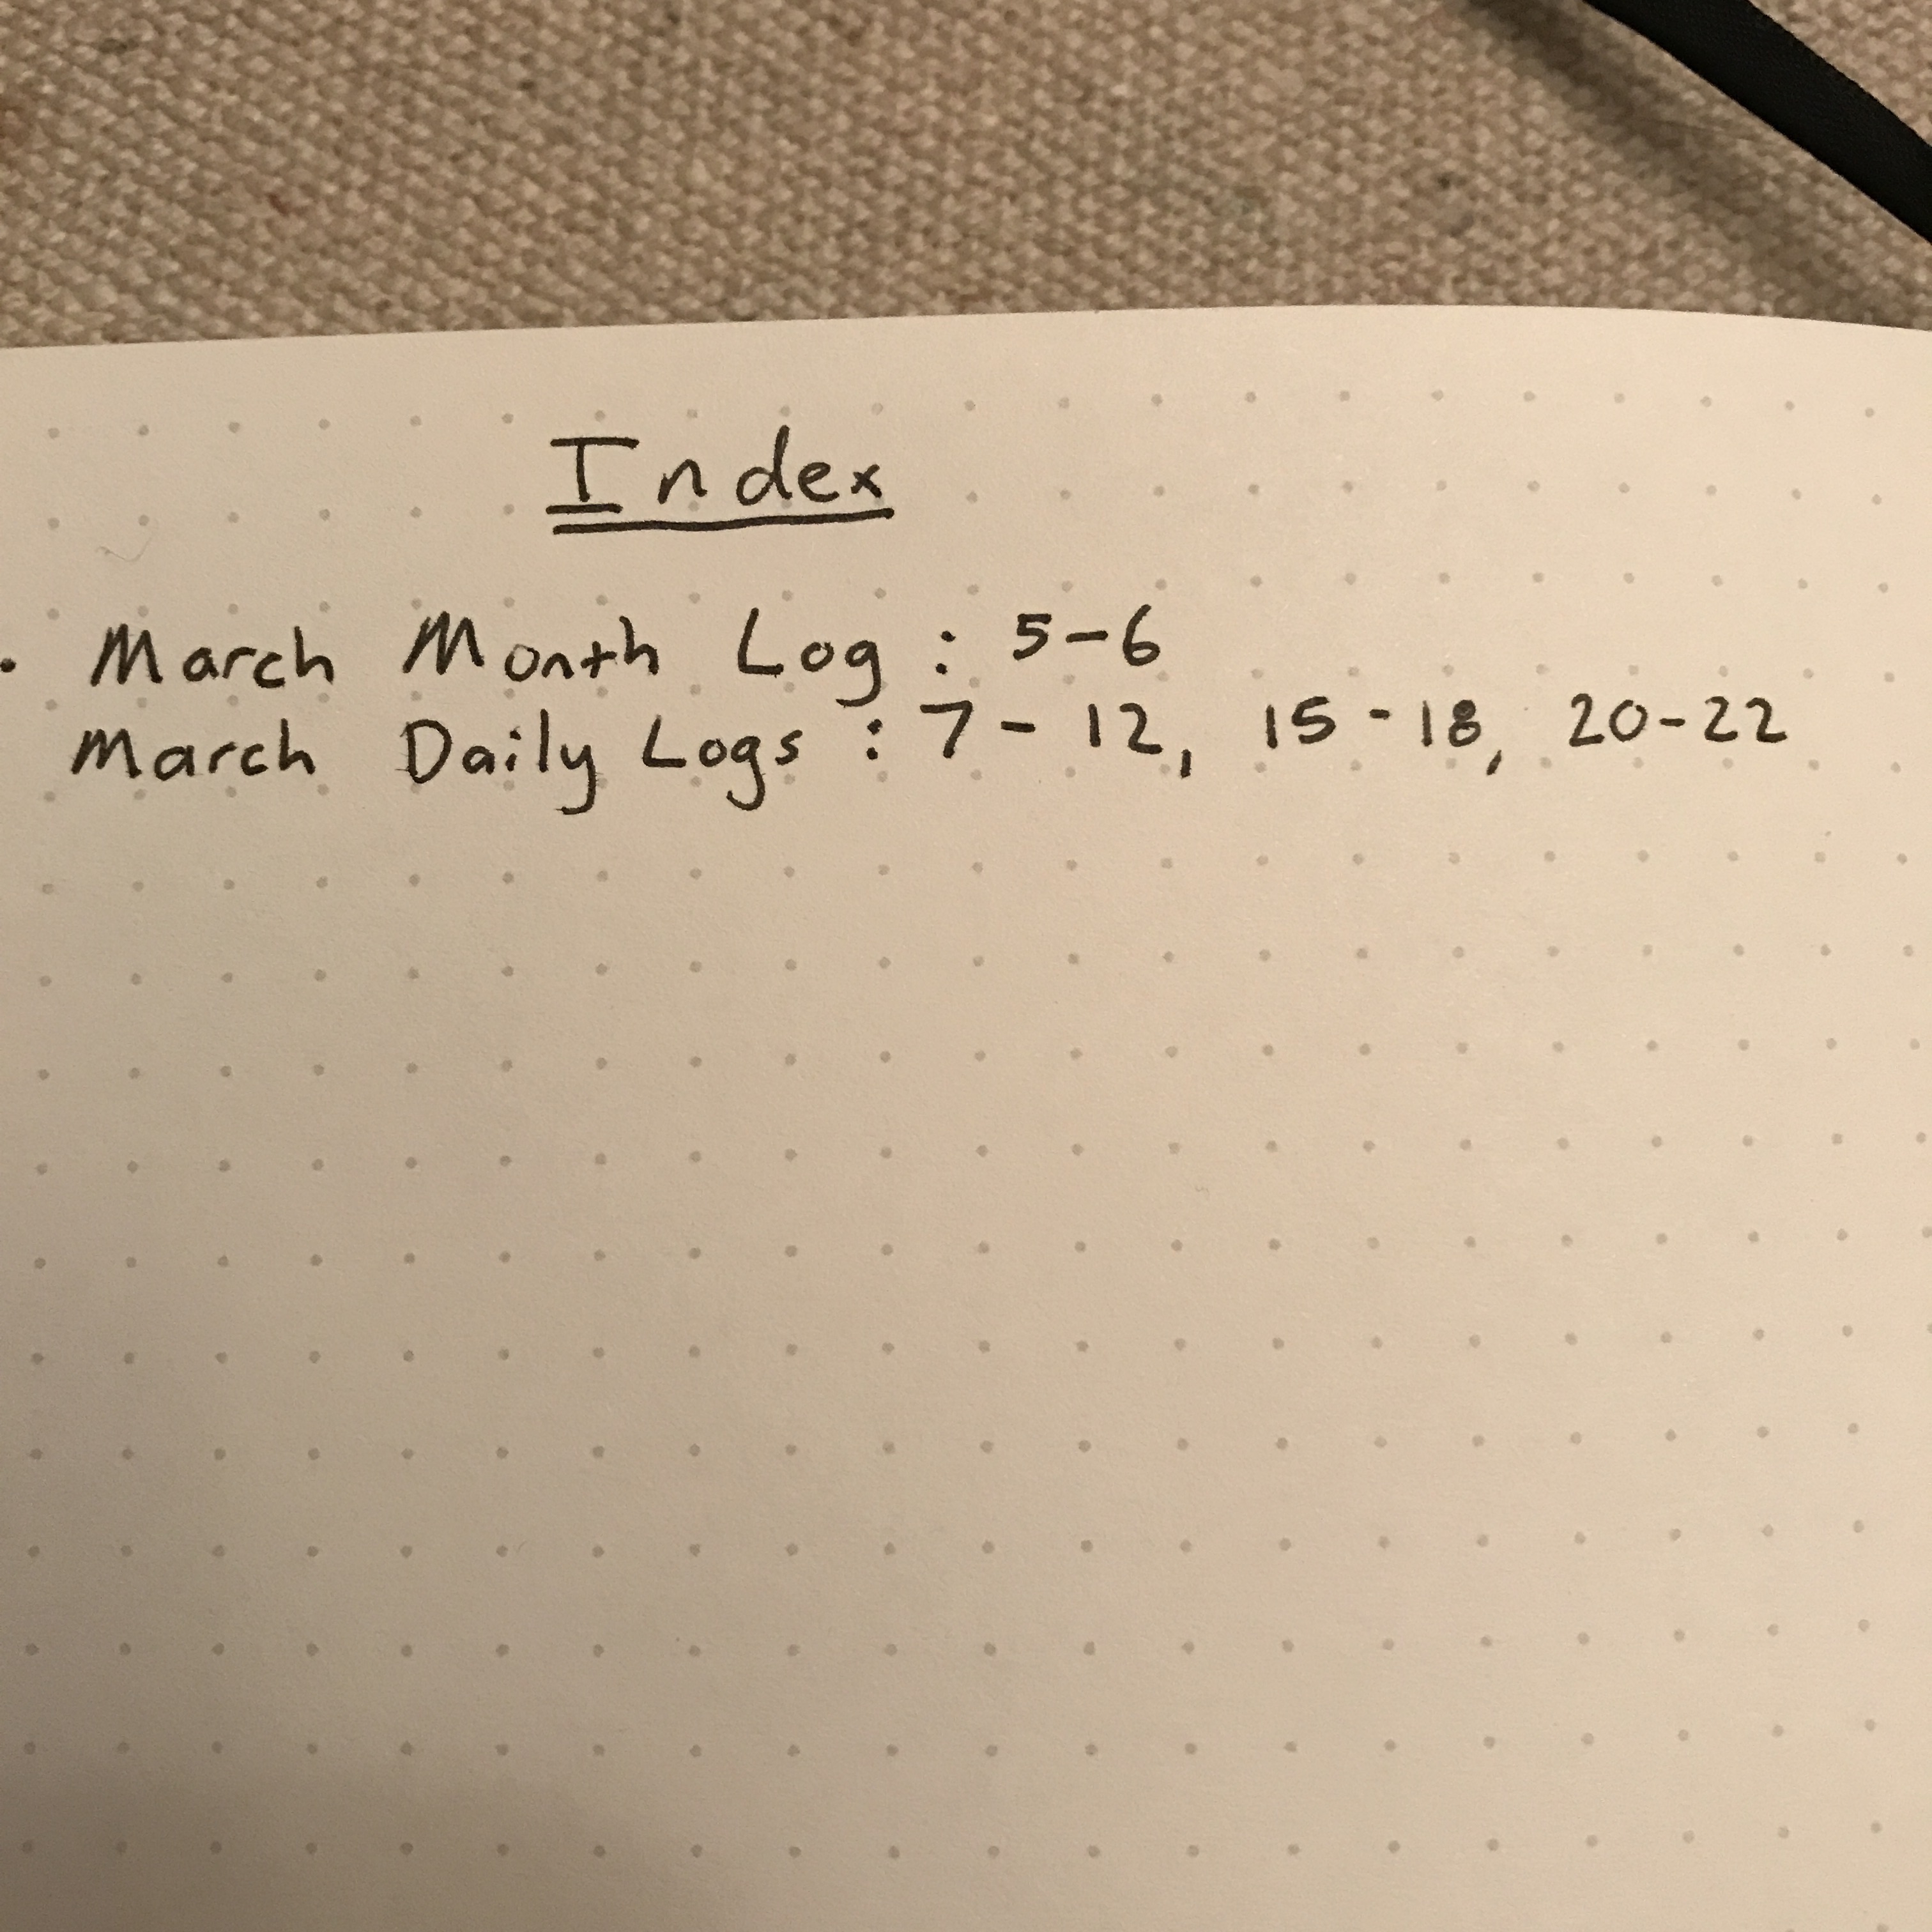
Since our journal is flexible, it lets us interrupt sections with other sections. We keep track of these jumps with comma-separated page regions.
3. The Long View
The long view is a two-page glance at the next six months. Open up your notebook to the first blank spread after your Index pages. If you have a ruler, now’s the time to use it. Draw two horizontal lines on each page, separating these two pages into six equal regions. Label each of these sections in the upper left with the next six months.
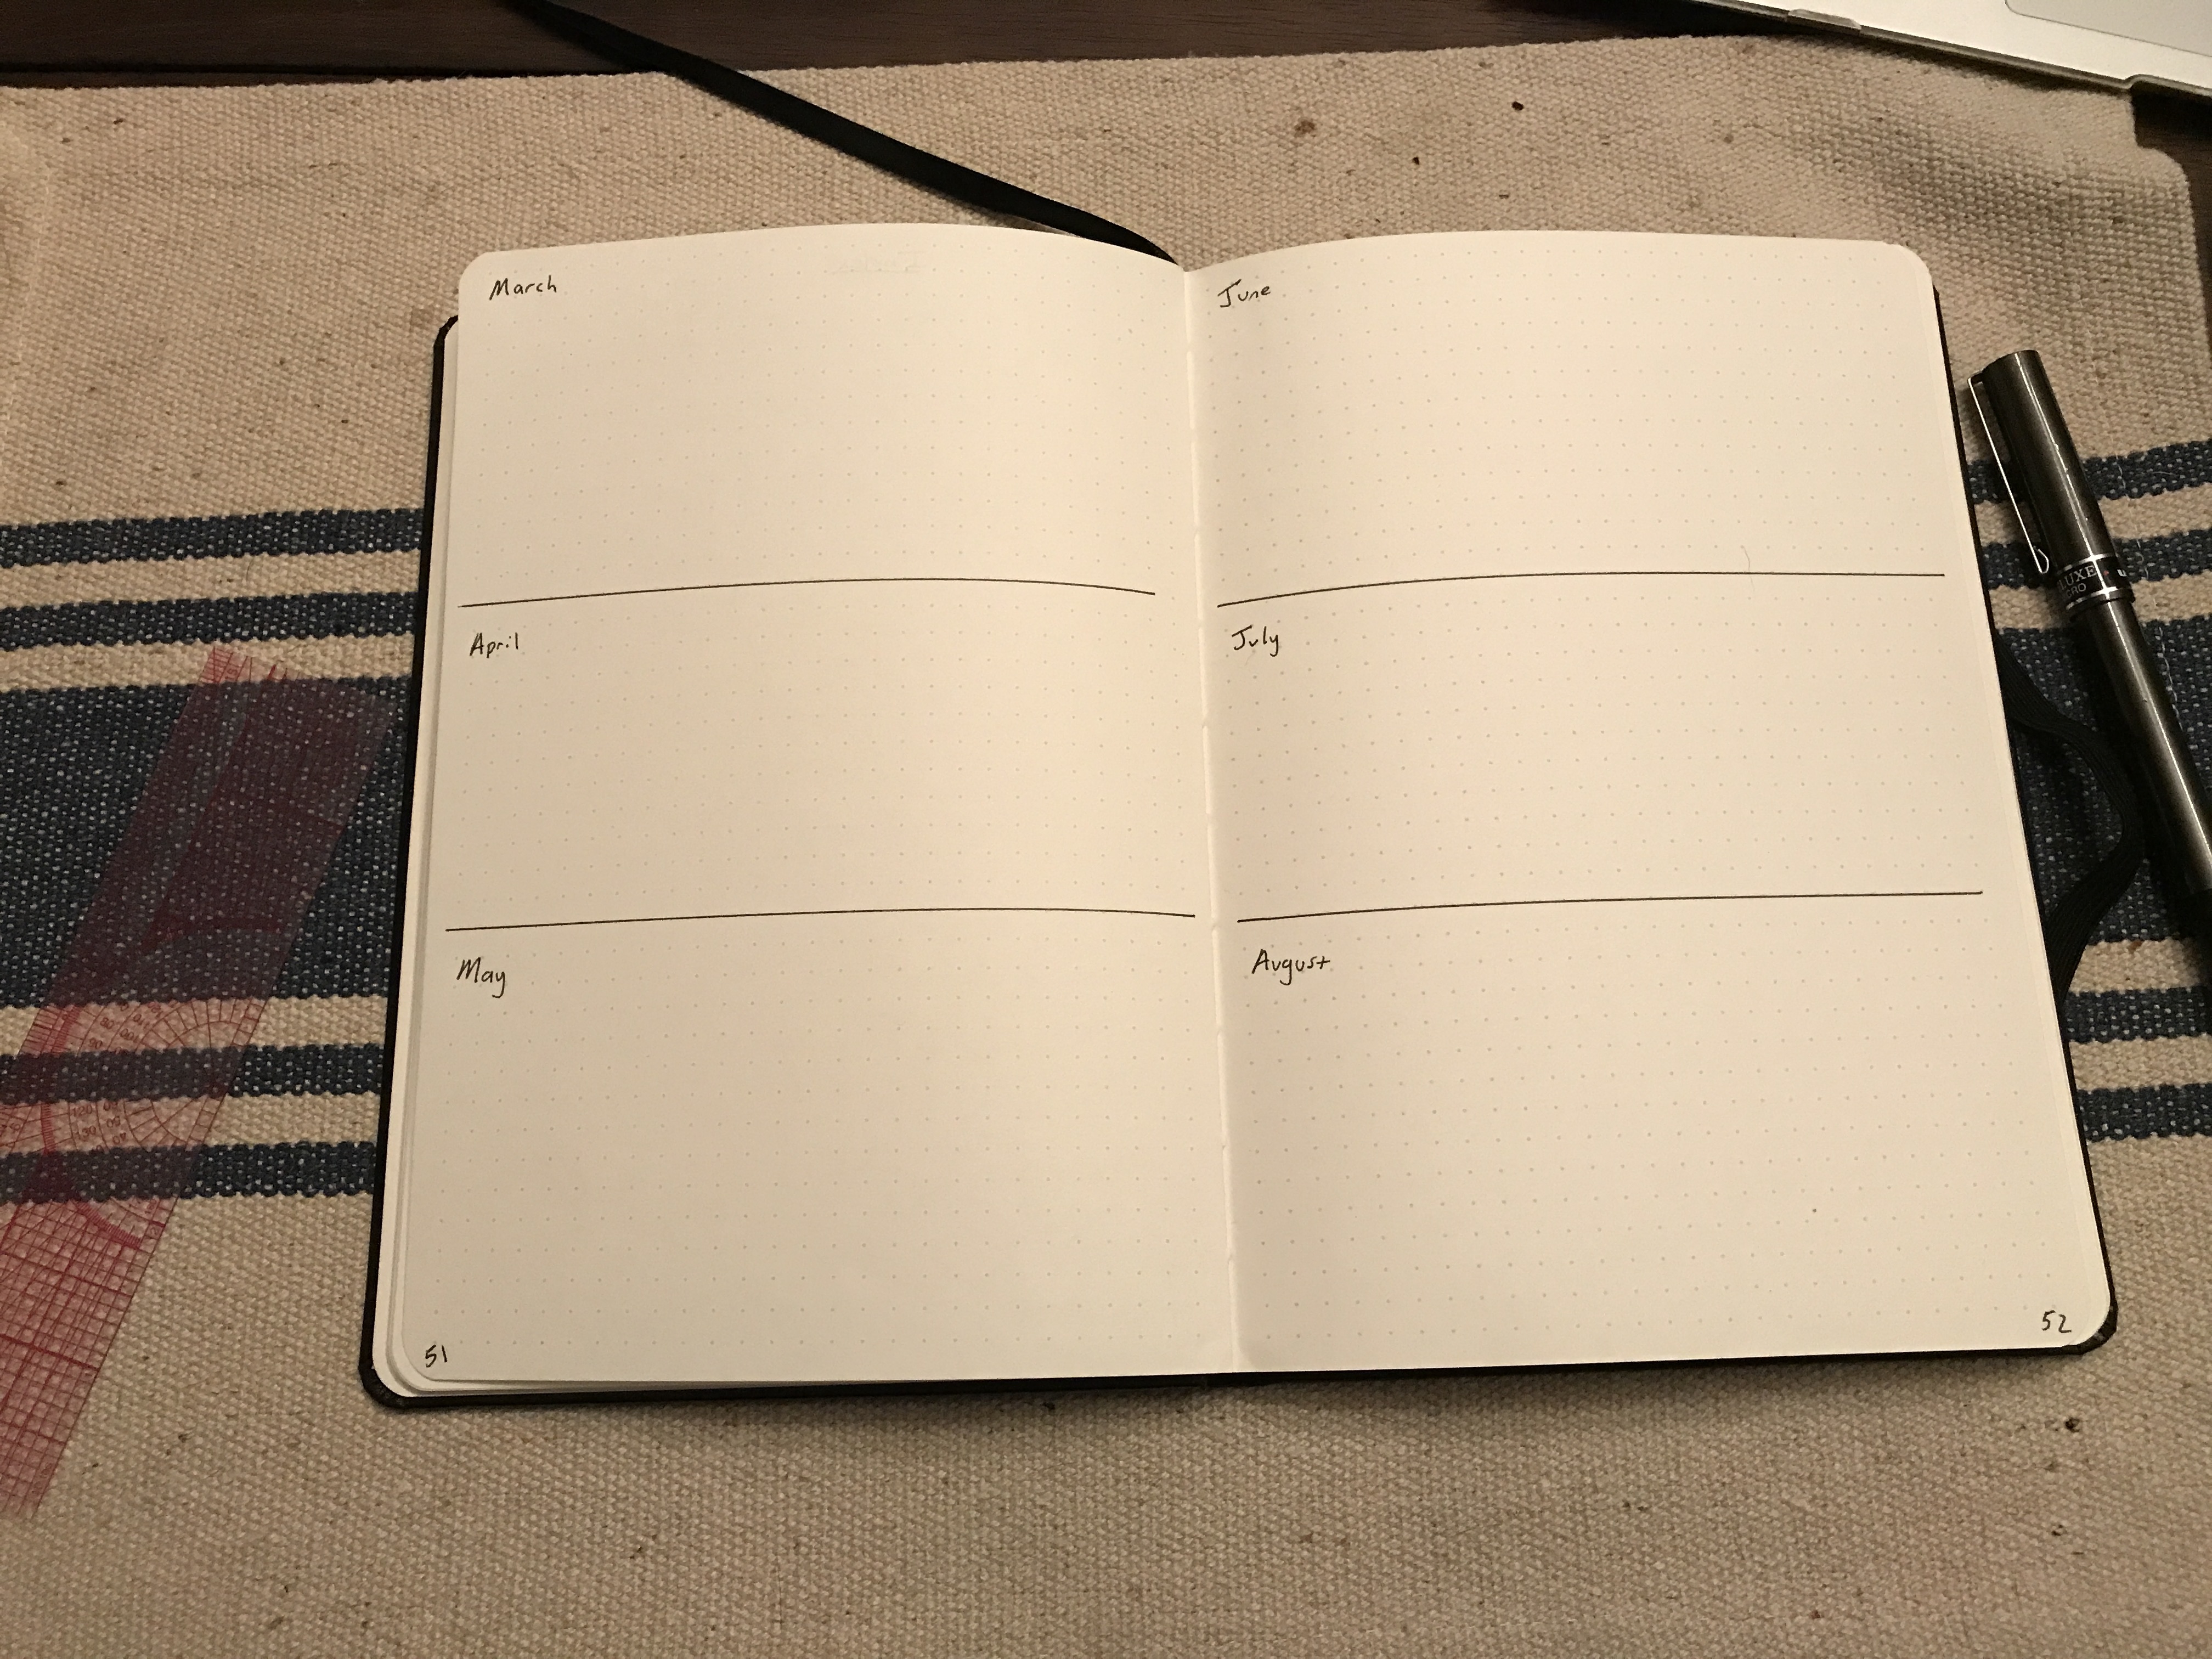
This section is for keeping tasks and information that is either a long-term goal or not immediately actionable. If someone invited you to a wedding in three months, this would be the perfect section for it. Add some goals to this section using a bullet point. When you complete these tasks, you can put a little X over the bullet point. We’ll talk more about different bullet styles for different items later.
You’ll use this section. to remind you of things when you fill in the more short-term sections in the next few months. And, since we’ve added a new section to our journal, don’t forget to add page numbers to the bottom of each page and add this section to your Index.
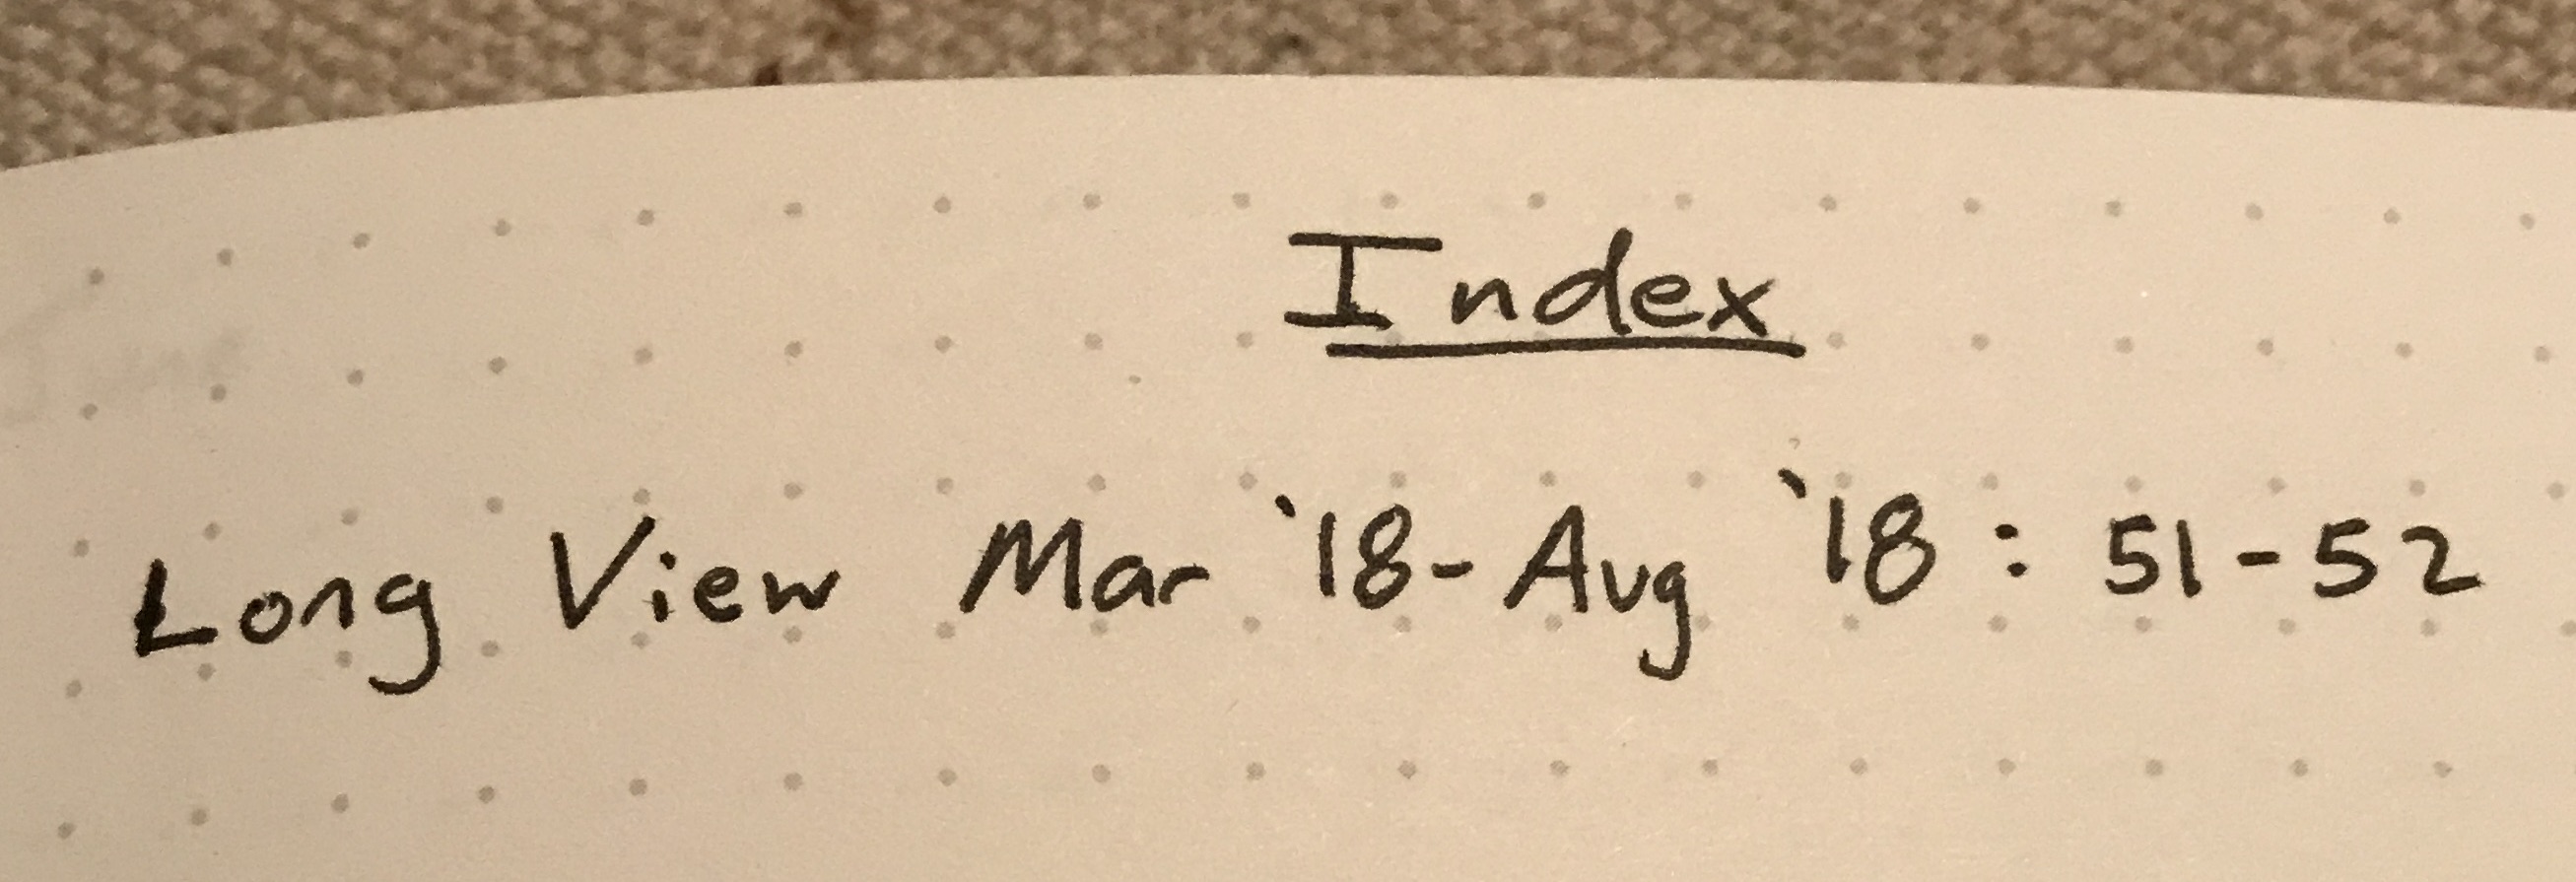
Bullet Journaling is a constant process of keeping track of the immediate and short-term stuff while frequently zooming out to take in the big picture as well. You’ll see that as we continue the next few sections, gradually zooming in on your life.
4. The Month View
Great! Now that we’re in command of our six-month goals, the next main page type is the month overview page. Open your journal to the next blank spread after the Long View. Title both pages with the name of the current month (which should be the first month on your Long View). The left page will be your calendar page. Fill in a vertical column with every number day in the month. For March, that would be 1 to 31, each on its own row. Just beside these numbers, put a letter or two to signify which day of the week this date will be. I also like to put a horizontal line between each week to help me visually see where I’m at more easily.
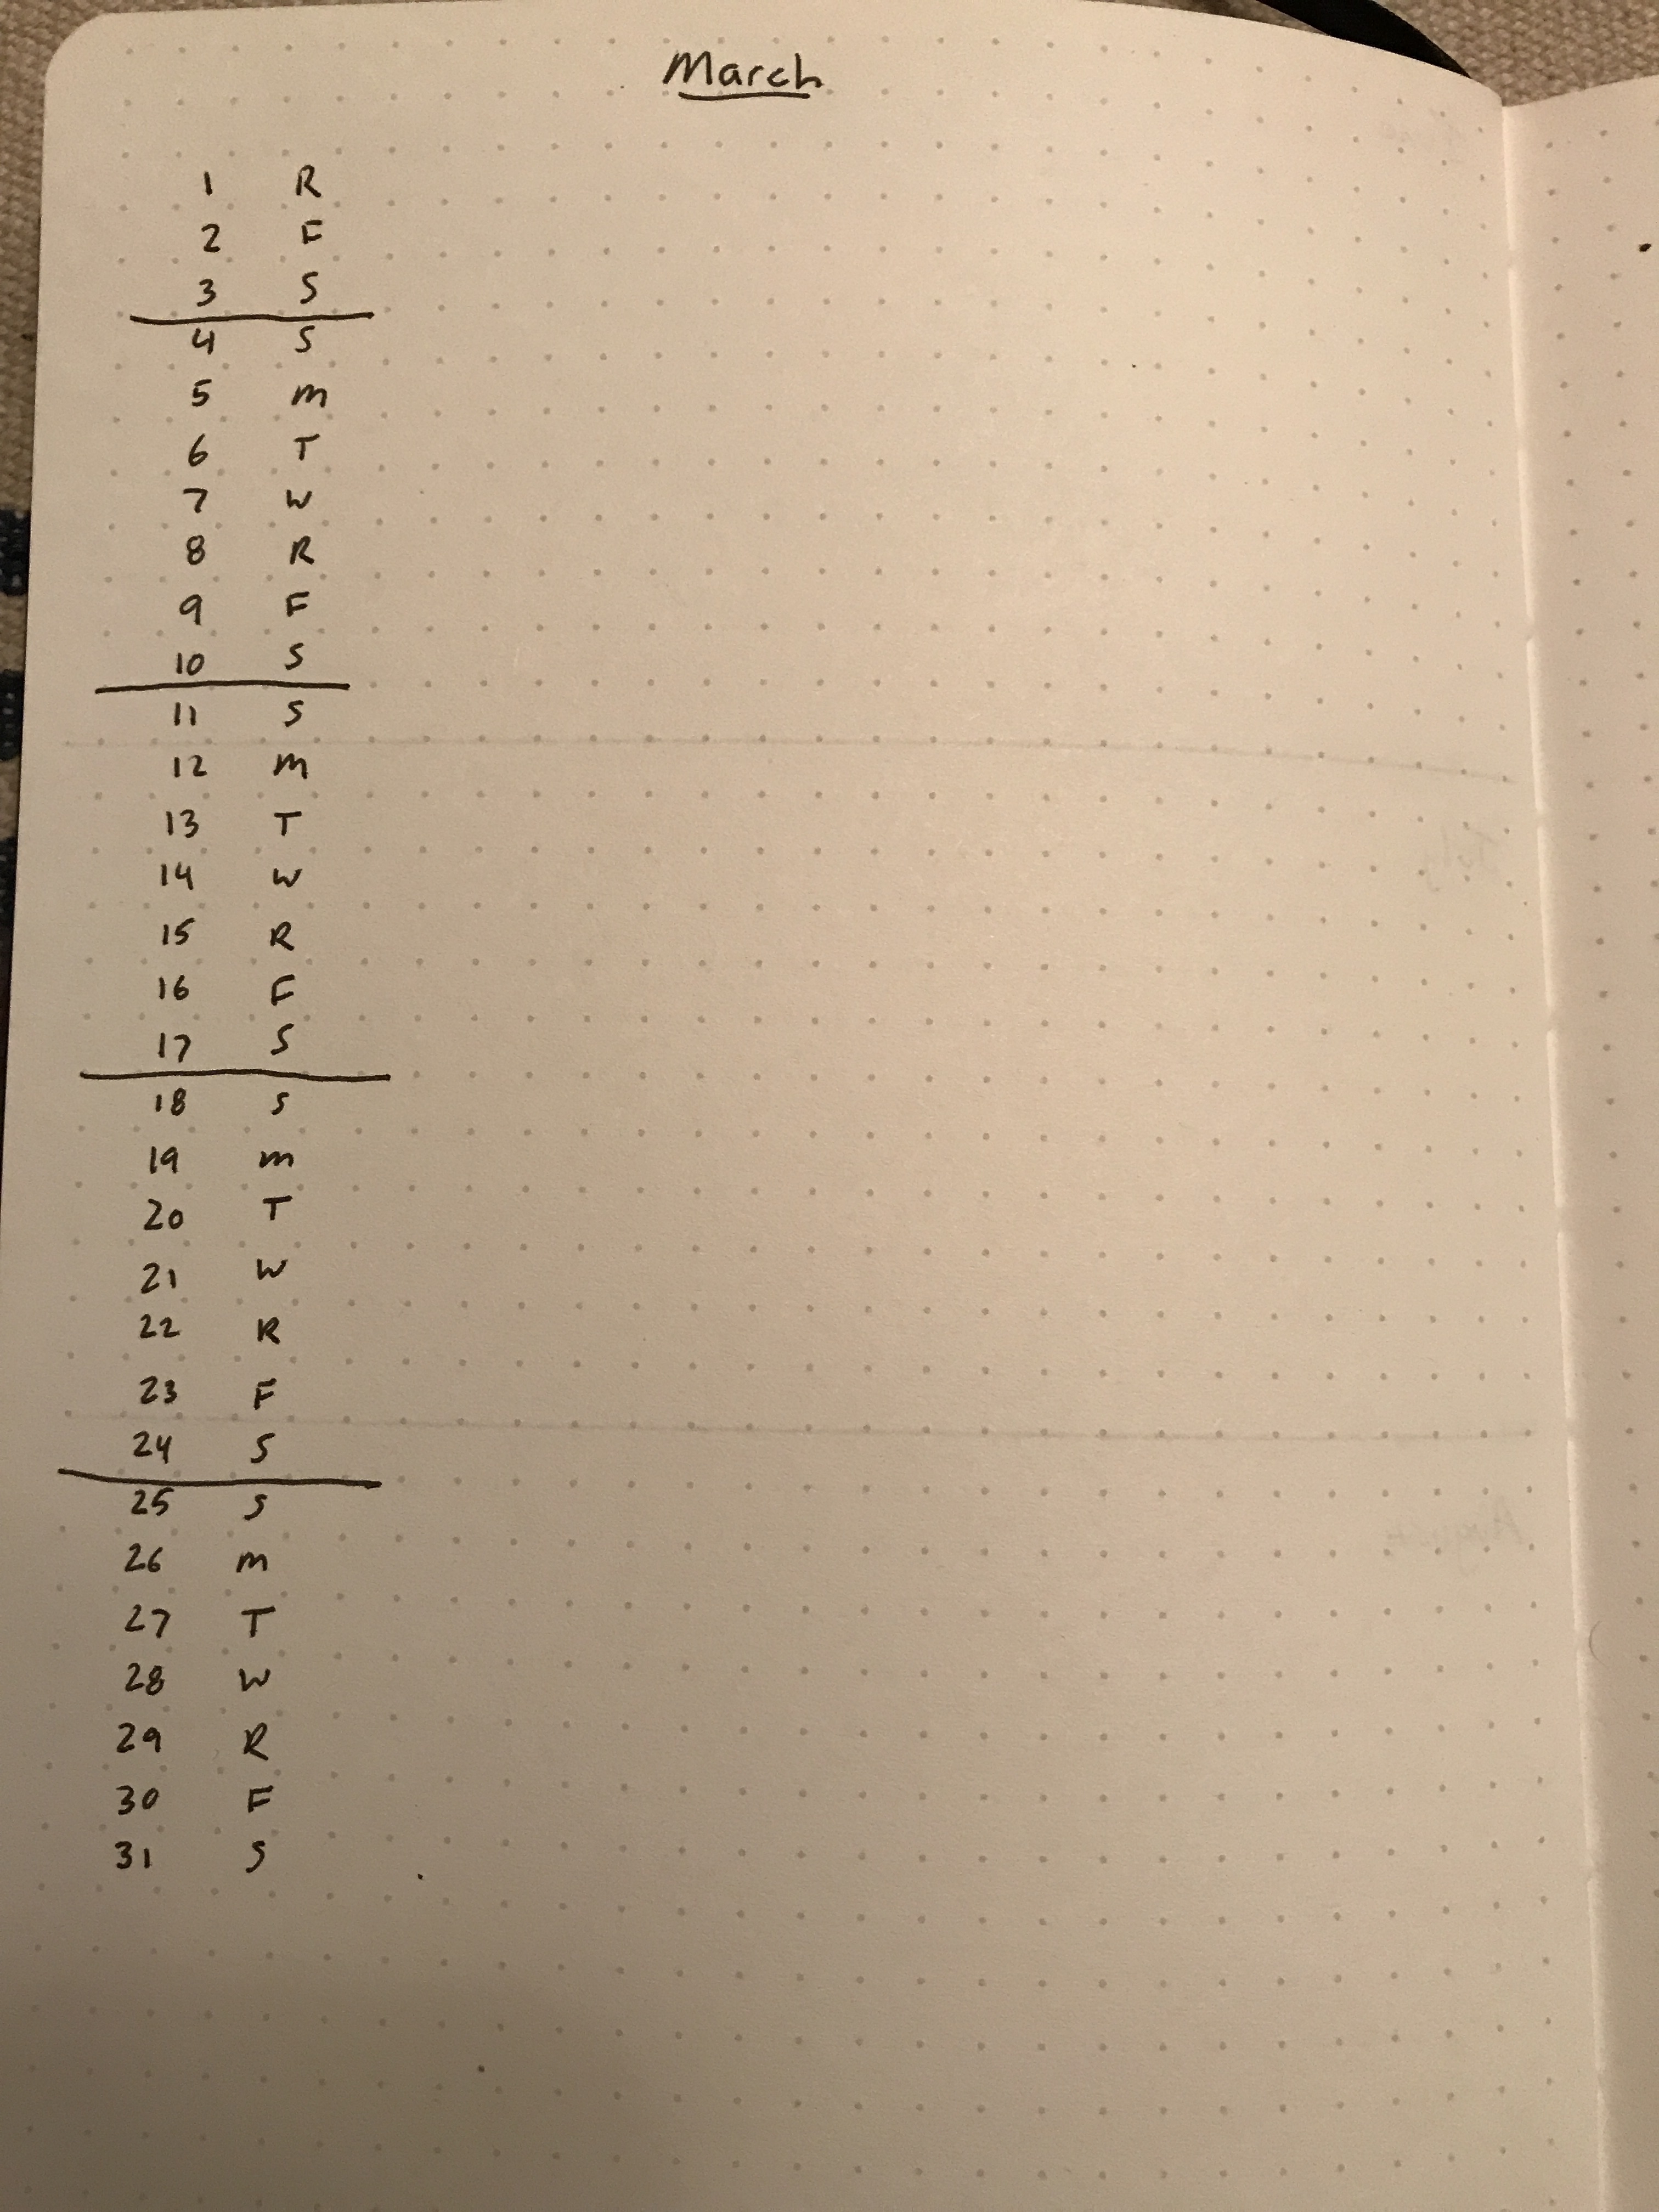
The right page of this spread will be the bullet page. Put down any to-do’s, tasks, goals, or notes that you can think of that will come up this month. I like to write any important dates/holidays/birthdays on the left side next to the numbers and letters. Be sure to turn back to your Long View to see if there’s anything there that you can import into your first month section. This will be an often-used technique.

Once you’re done, don’t forget to add some page numbers and add this section to your Index.
5. The Daily Log
This entry type will be the majority of what you do in the bullet journal. Once again, open up your journal to the first available blank spread after your first Month View and label it with “(Name of Month) Daily Log”. Then, place a section header on the page with today’s date. Put any tasks or to-do items that you want to get done today. Just like before, don’t forget to flip back to the Month View and even the Long View to see if there are any items that need to be imported into today’s tasks.
Try to be realistic, but don’t be afraid to put some stretch goals down as well. If you don’t get something done today that you planned on, don’t stress out. Just work on one day at a time. At the end of the day, I like to put some notes about other things I did that day or what else happened. I find that, over time, this helps me actually remember the days and weeks that pass better, helping me treat each day as more special. I tend to get to the end of the week and can remember the things I accomplished, keeping things from getting monotonous.
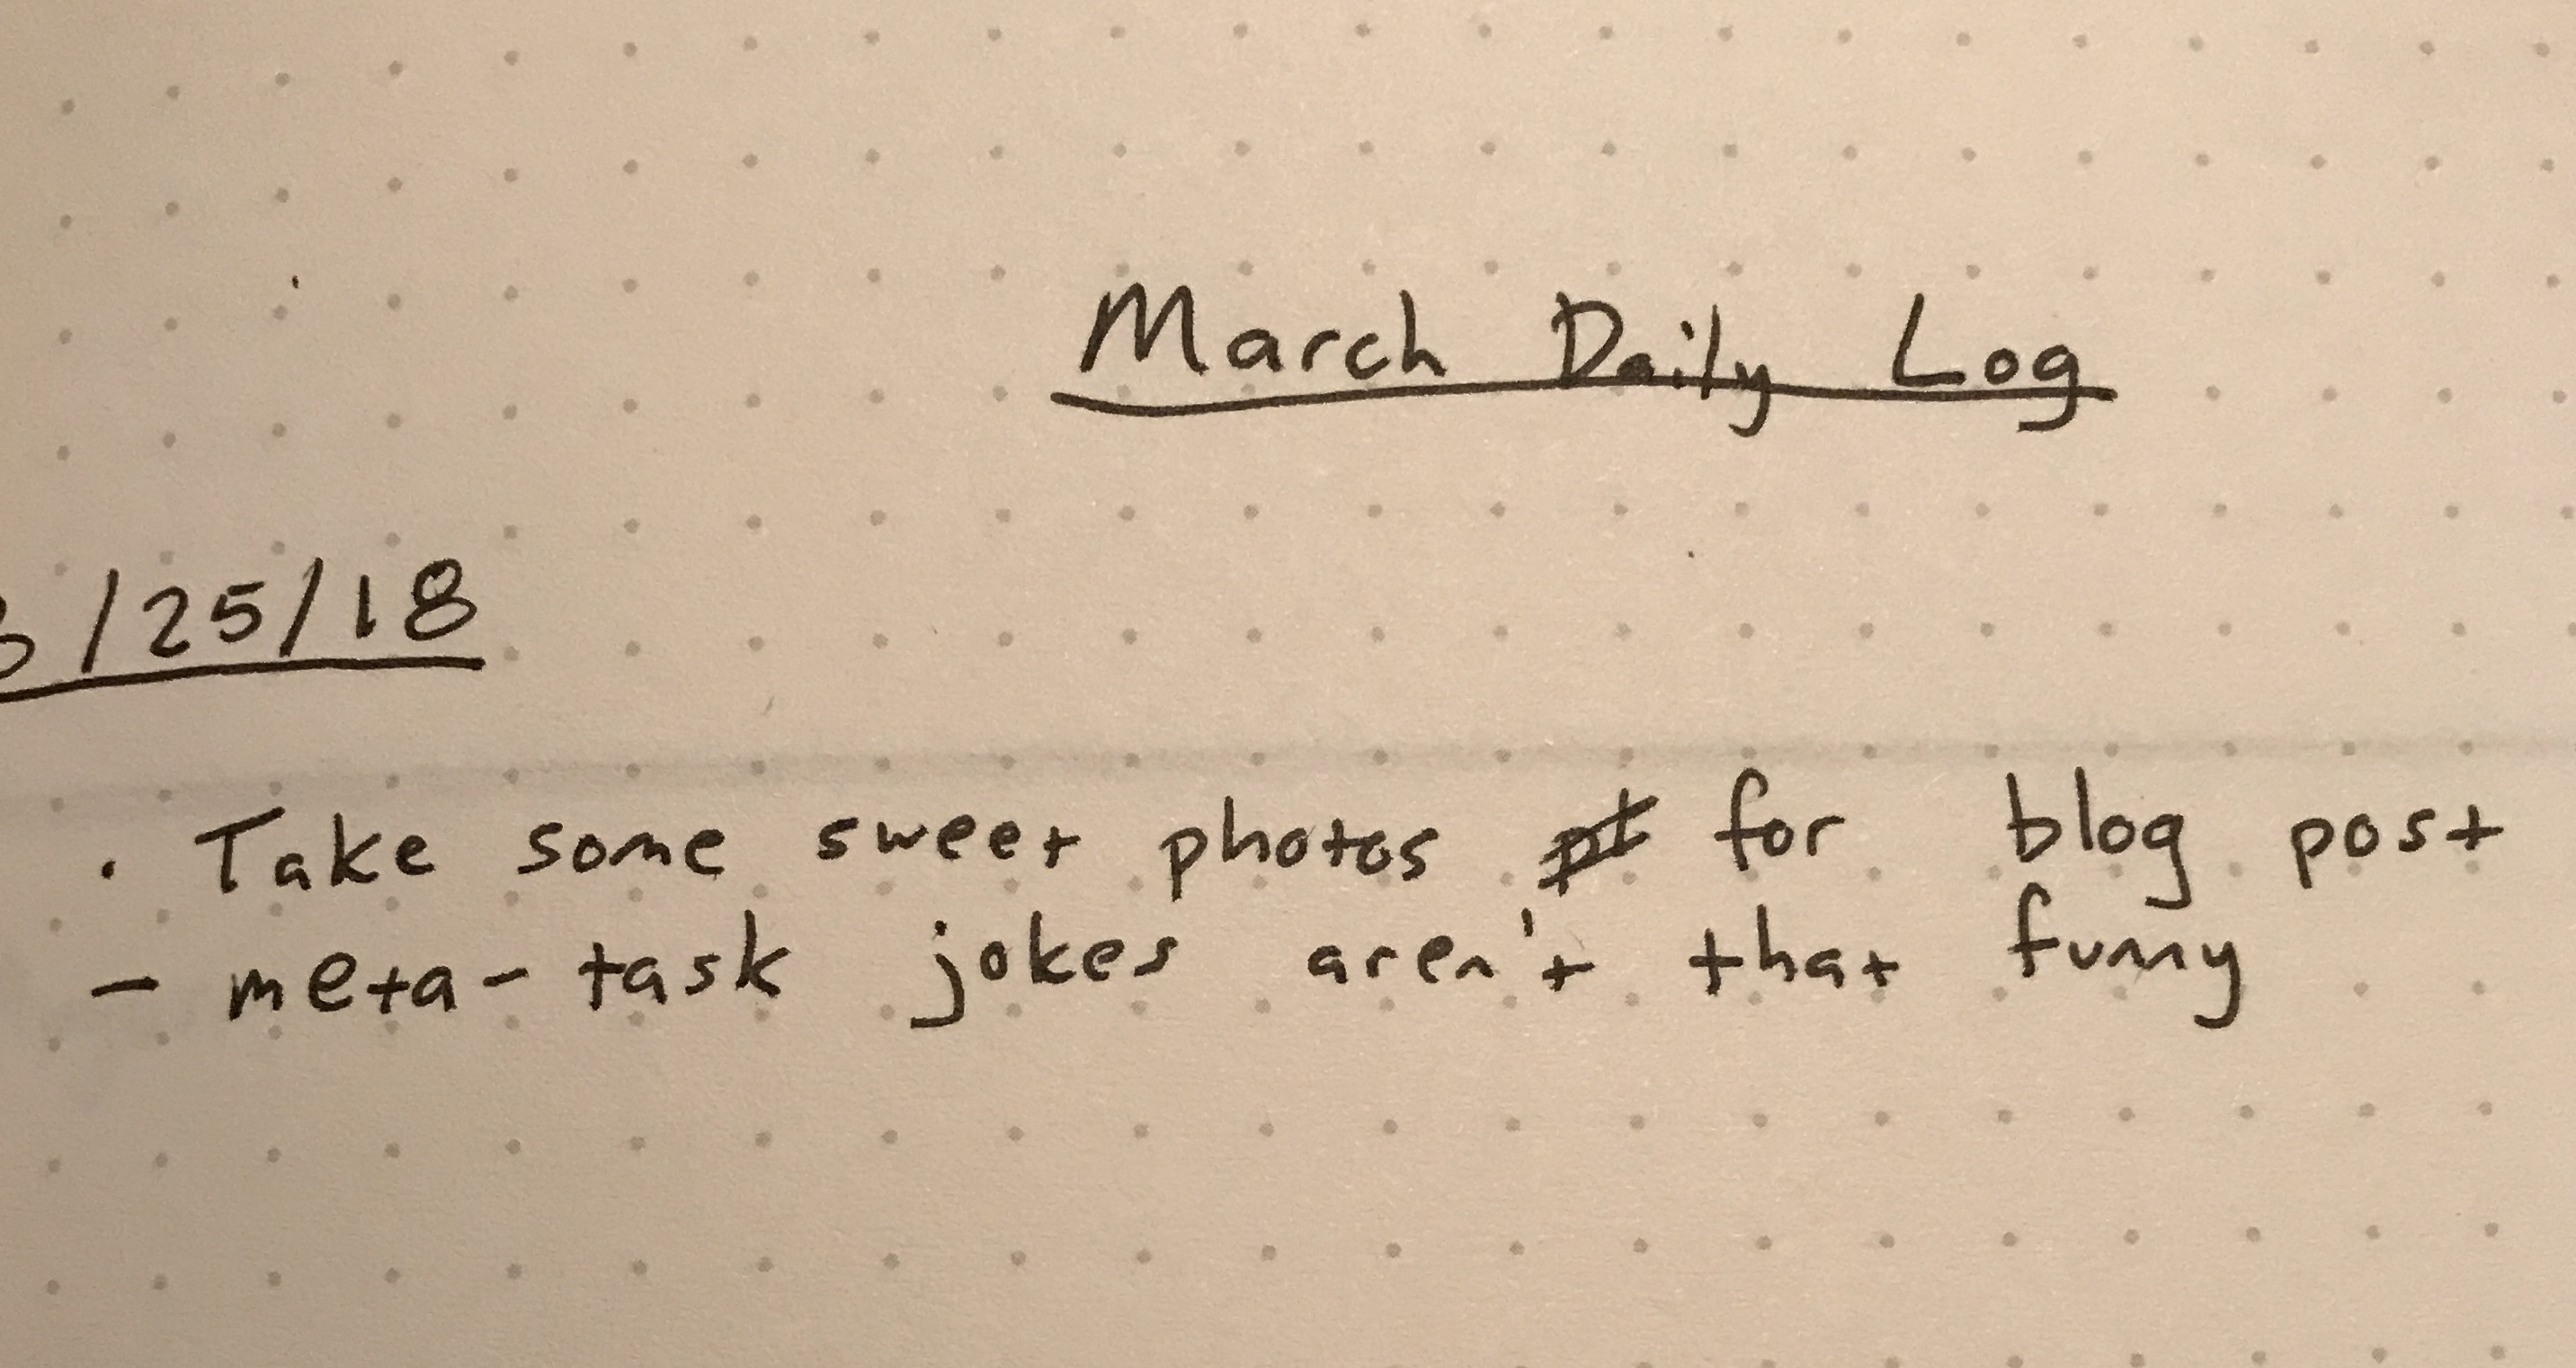
Add some page numbers and add your Daily Log section to your index. Since you’re not sure how many pages this will take up, just put a starting page number and a dash. If something else comes up and interrupts your Daily Log, you can put the ending page number and a comma, and put the next section of the Daily Log into the index when you start it back up again. We’ll talk more about this in the Threading section.
6. The List/Notes Page
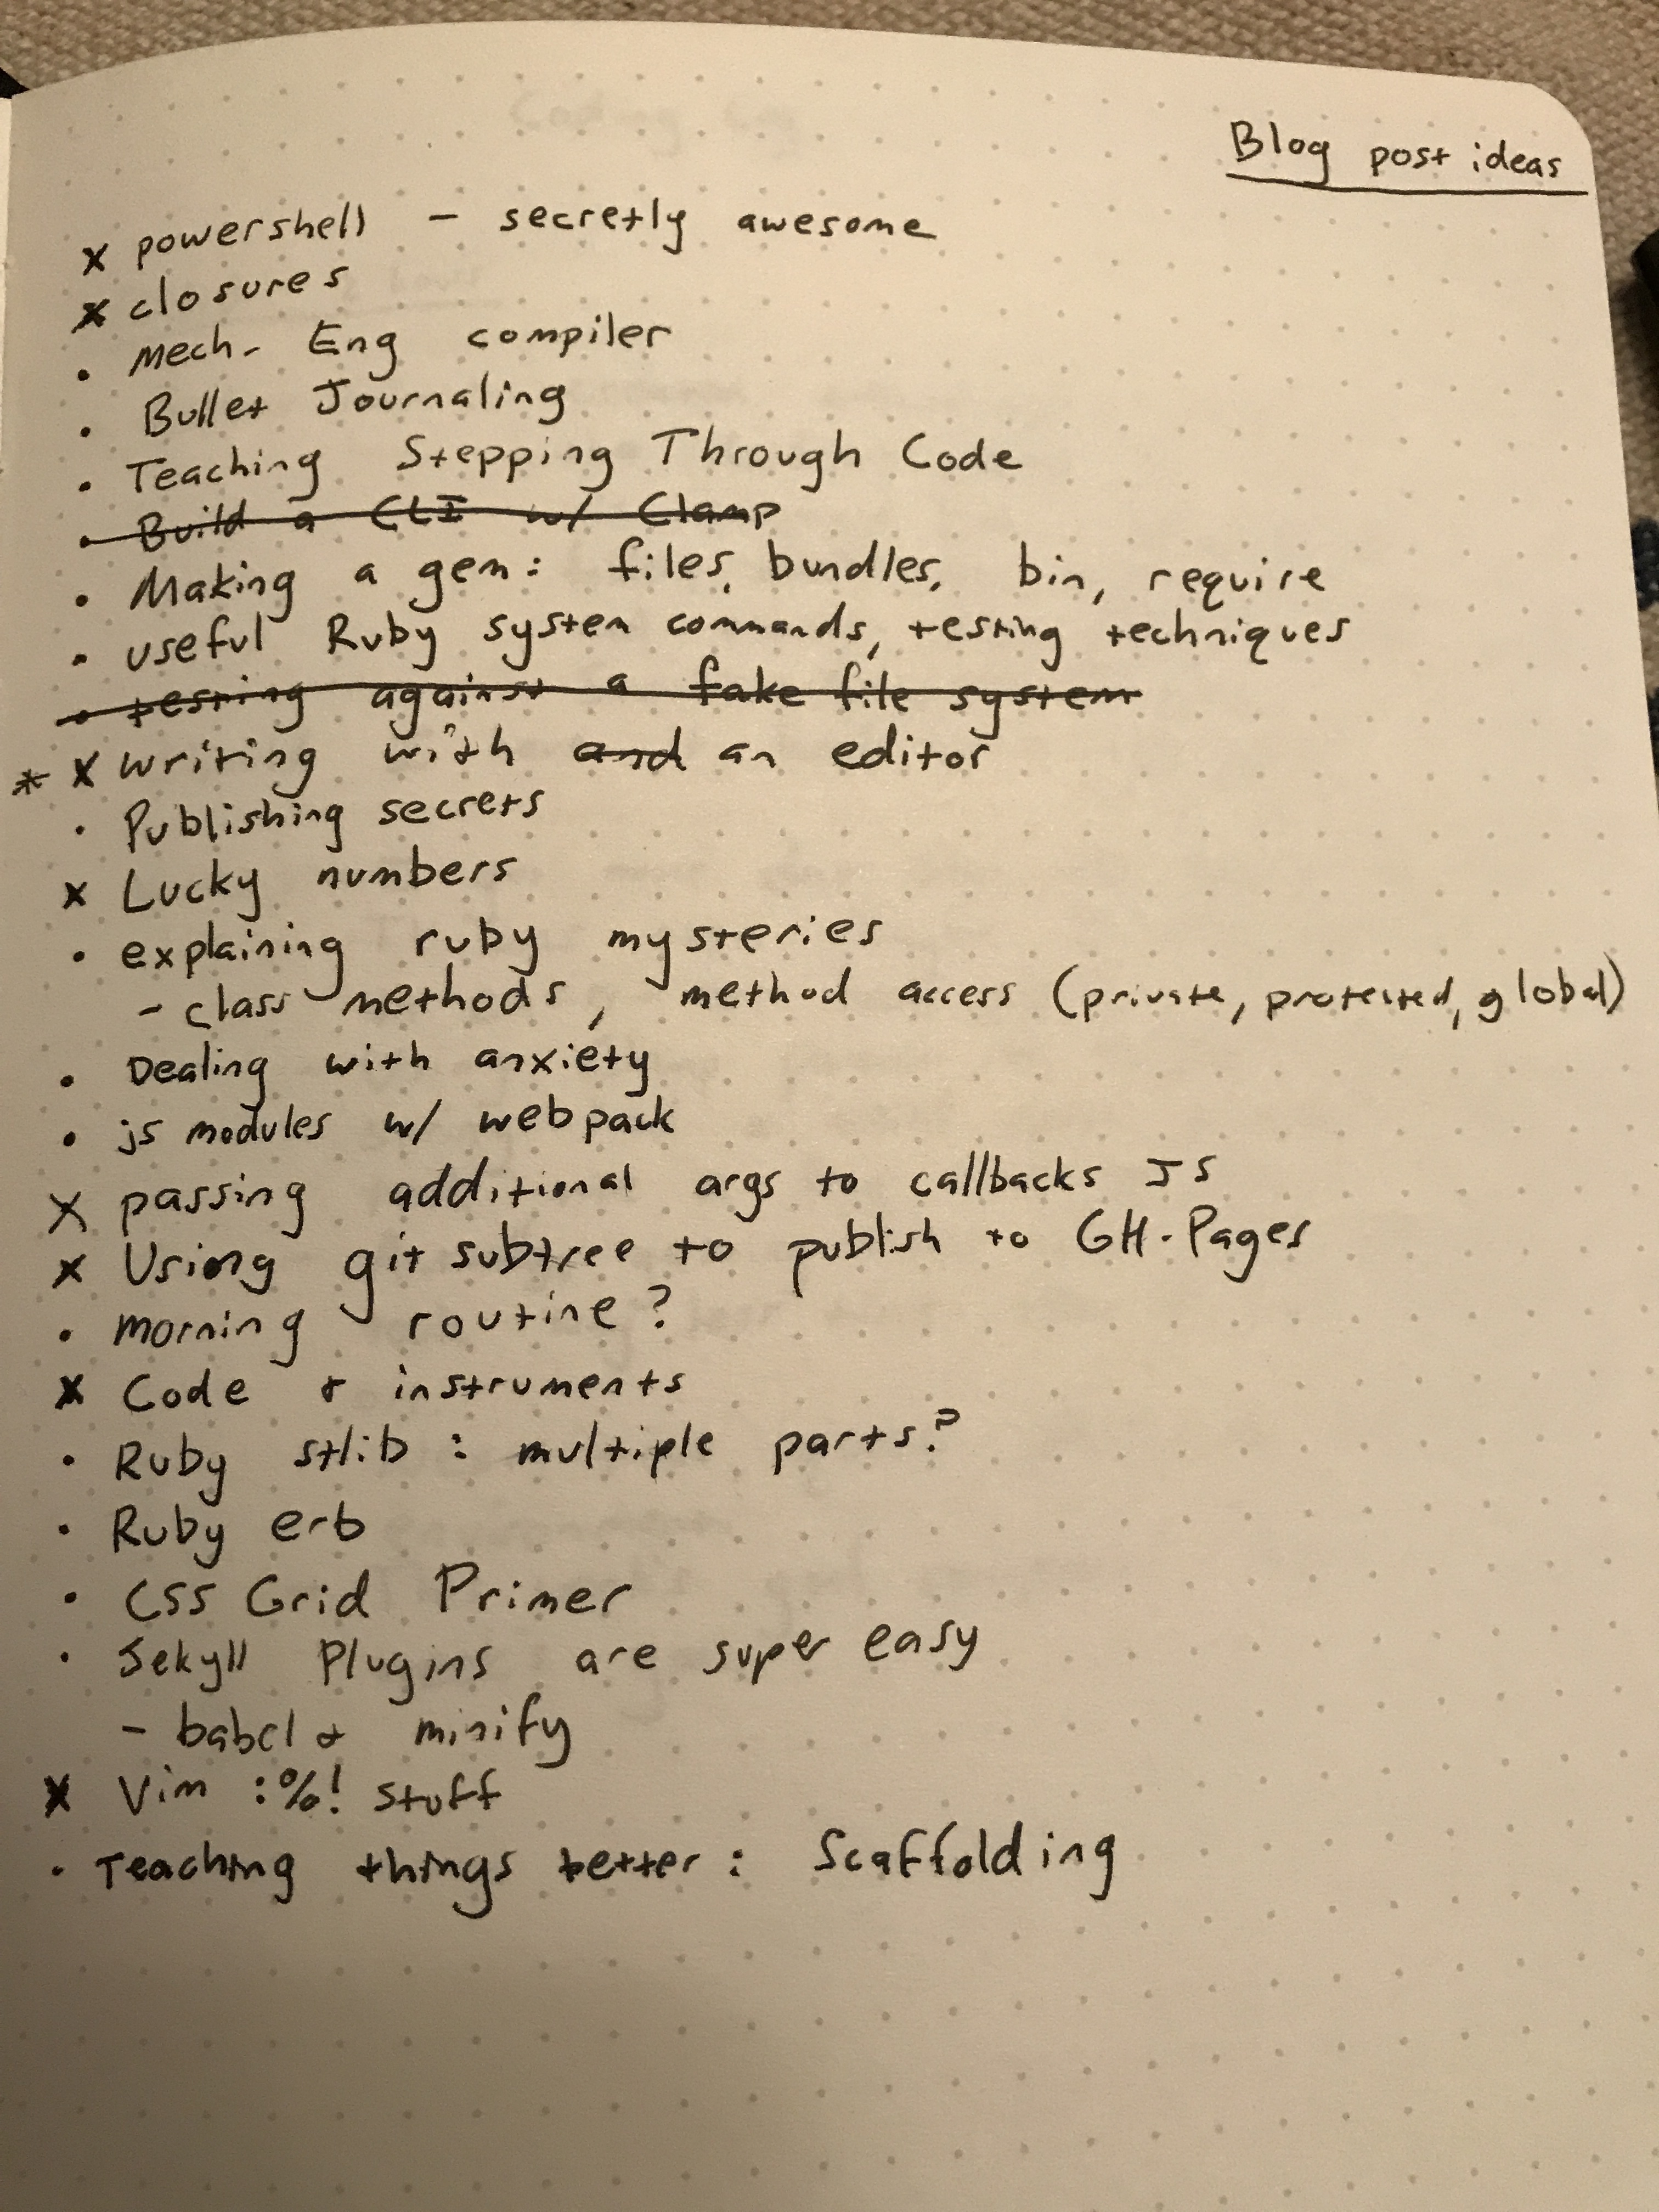
It might happen that you’re going through your daily logs and you decide to watch a how-to video or take on online course — something where you want to take notes. I do this a lot while reading programming books and tutorials, and I’ve found it really helps me remember things a lot better, and gives me a little better information source than having to constantly Google the same things. Simply put a header at the top of the page, give yourself a few blank pages to take notes in, and start jotting down your notes. Add page numbers as you get to each page, and add this section to your Index so you can find it again later.
7. Threading
This is one of the key techiques of bullet journaling and the thing that makes it so flexible. It’s how you can safely interrupt your daily logs with a grocery list or page of notes without worrying about leaving a bunch of blank pages in between. Your notes sections can interrupt each other and stop and start as many times as you like. It just makes your Index look like this:

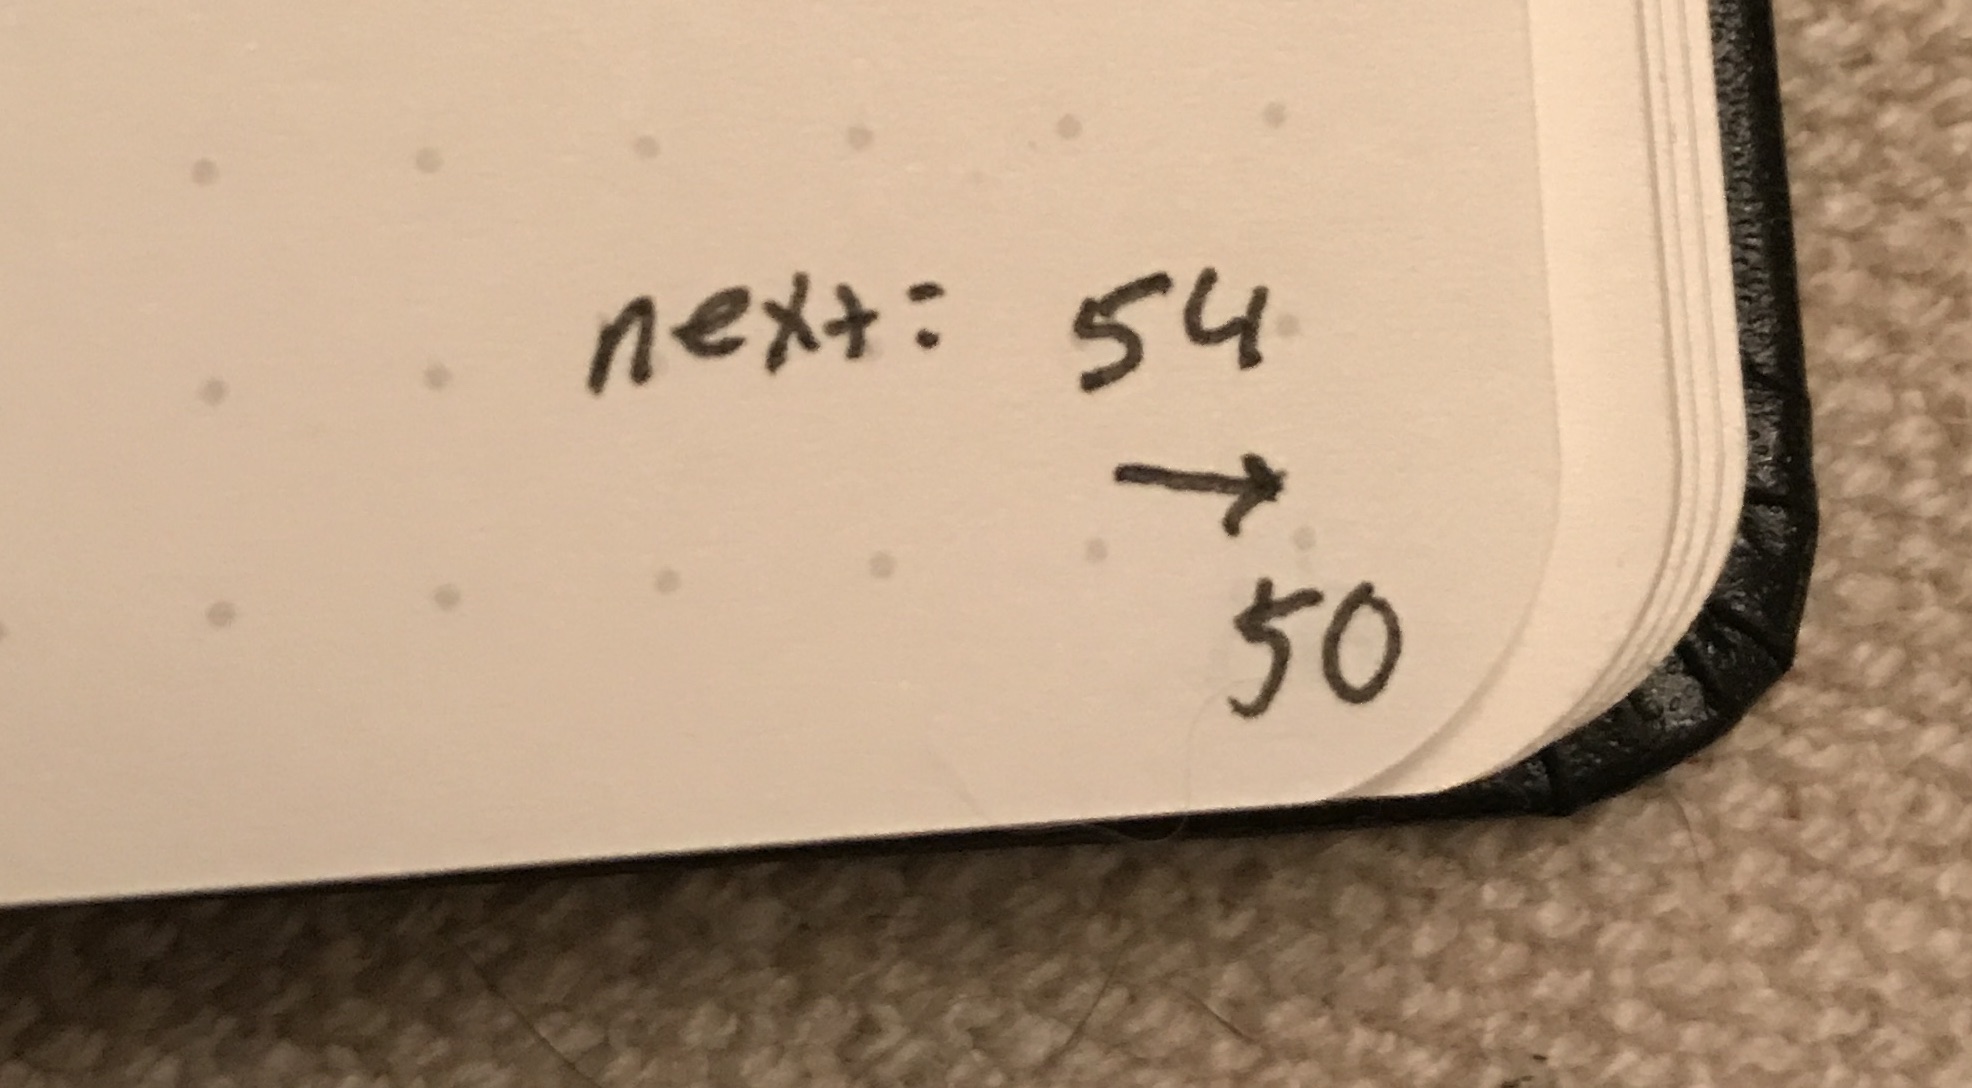
I’ve also found it useful to put a little note to myself about where the next section starts or ends above the page number in the section itself, so I don’t have to turn back to the Index all the time if I don’t need to.
8. Different Types of Bullets
As we’ve discussed, the basic task unit of bullet journaling is a dot.

When you complete this task, you should put a little X over it, like this.
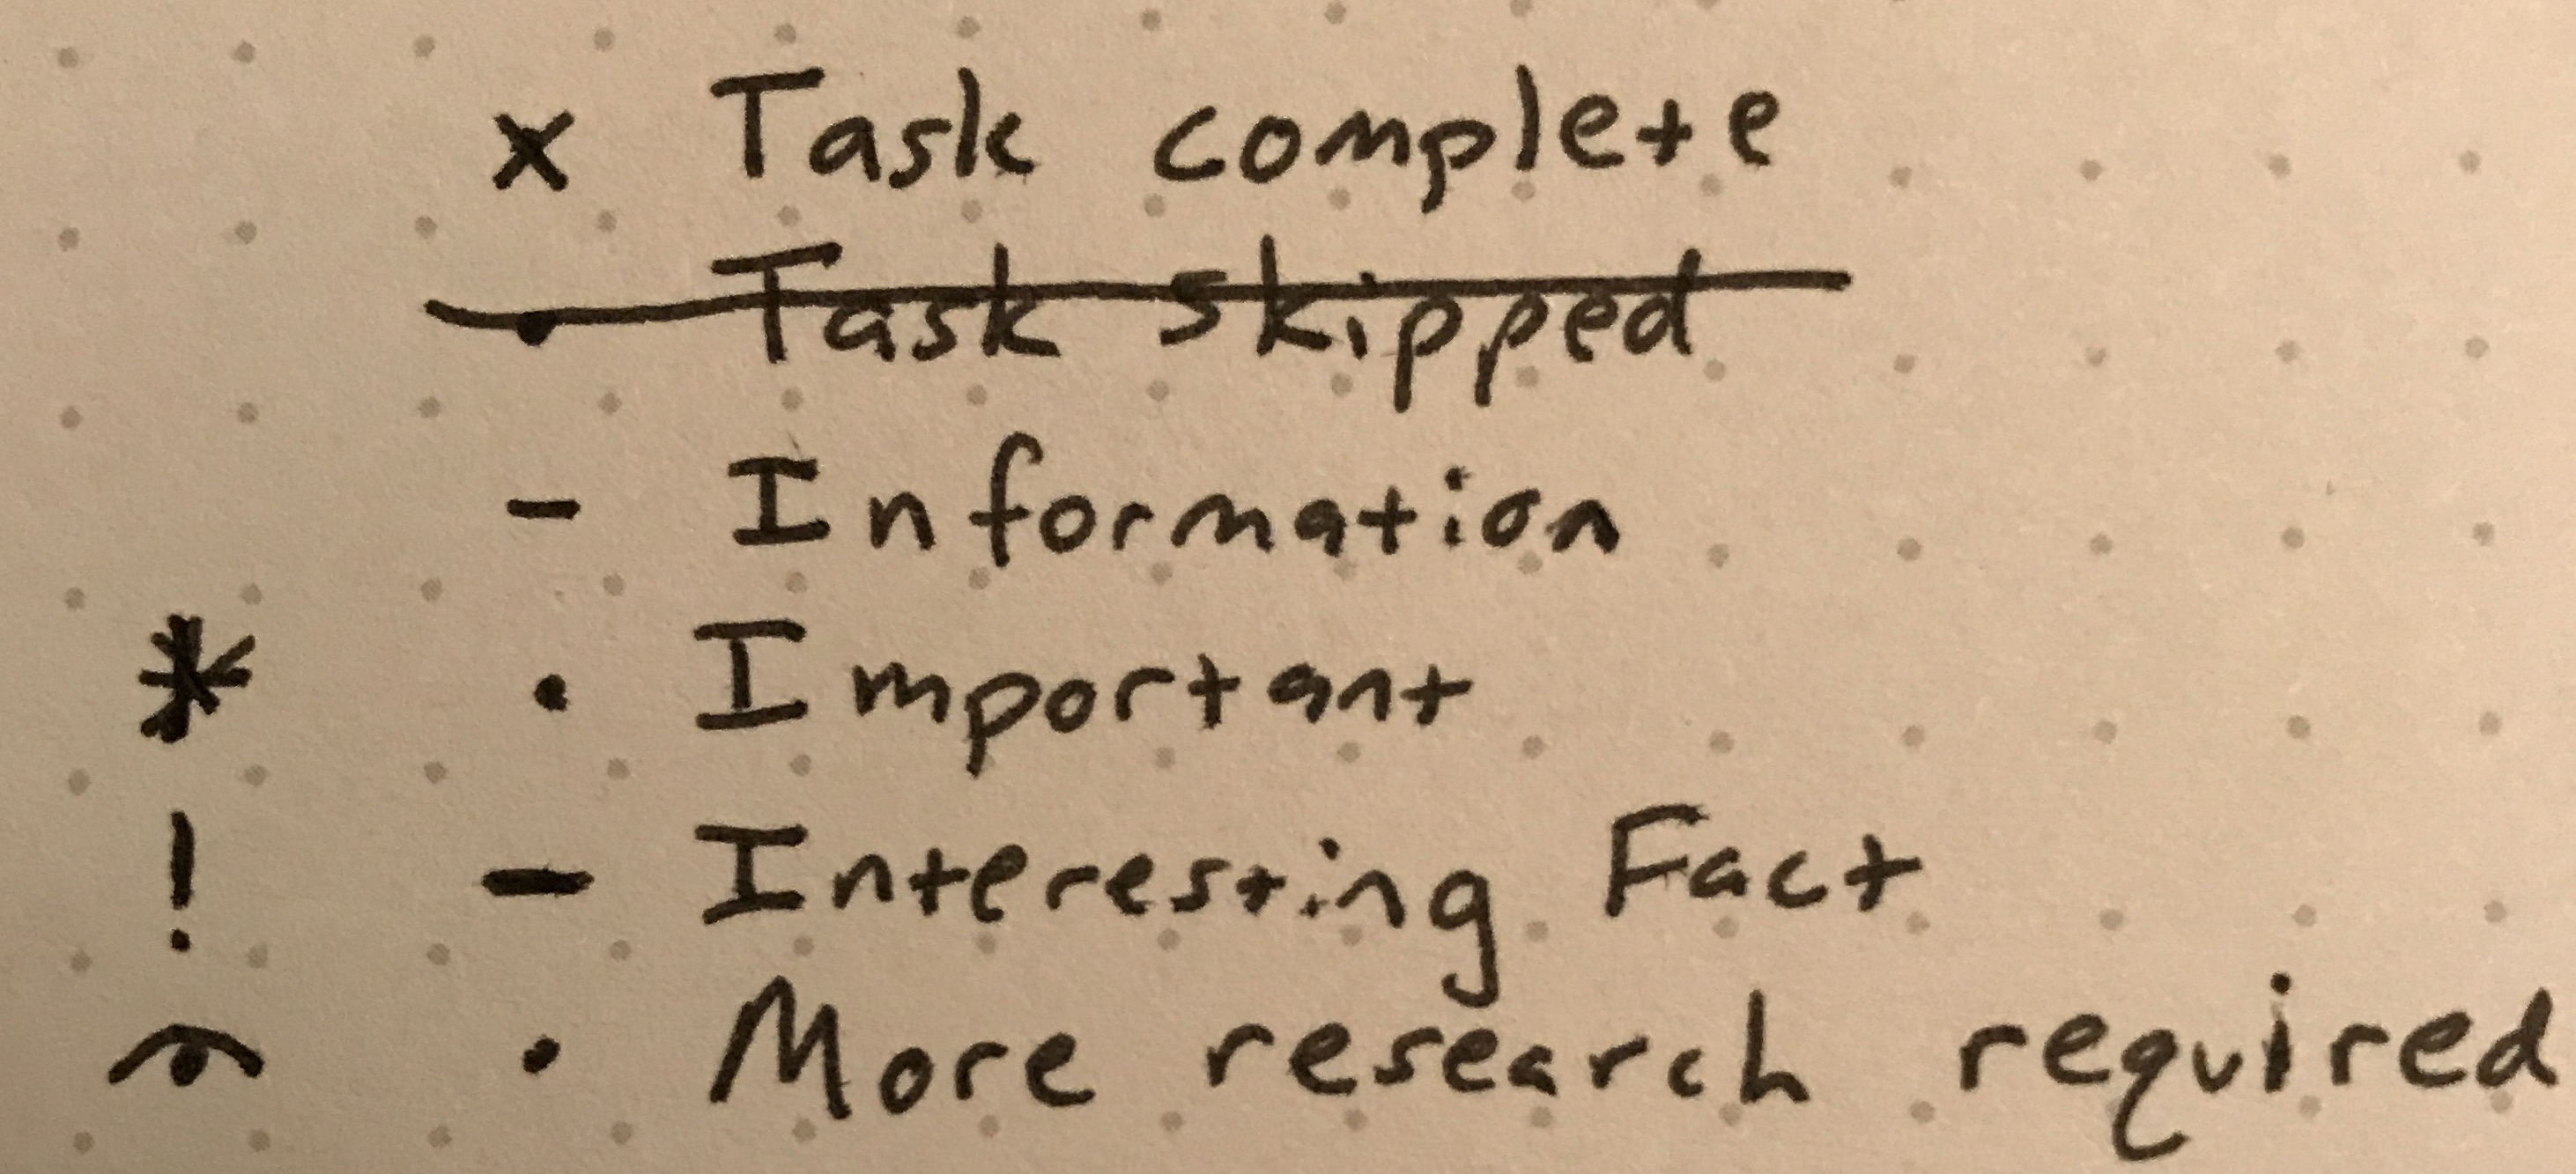
One of the main goals of bullet journaling is helping you weed out the things that aren’t worth your time. If you decide a task just isn’t going to get completed or you don’t want to do it, just put a single line through it.
If you have something that you want to note down, but it isn’t really a task to complete, use a dash.
If you’ve got a task that is important or that you want to draw extra attention to, put a little asterisk next to it.
If you’ve got something exciting or neat (usually paired with an information/note dash), put a little exclamation mark next to it.
If something needs a little more looking into, put a little eye next to it (or something that vaguely resembles an eye).
9. Migrating and Scheduling
At the end of each month, you should go through the previous Month Log and the previous month’s Daily Logs. Find all of the tasks that weren’t completed. Now is a good time to put a line through anything that ended up not mattering or not getting done. If there’s something that still ought to get done, you have a couple of options. You can put a forward-facing arrow and push in into your next month’s Month Log or a Collection/List page that you’ve created. This is called “Migrating” a task.

Or, you can send it back to the Long View to get completed sometime in the future. Do this by putting a backwards-facing arrow in front of it. Then be sure to write it in the Long View in the appropriate place. This is called “Scheduling” a task. (I like to call it creating a problem for Future-Me).

Locked and Loaded
If you’ve made it this far, you’re well on your way to being a bullet journaling master. Here are the main things to take away. Bullets should be fast, so they’re not a burden on your schedule, but they don’t have to be. If you’ve got some extra time to sit down and take more detailed notes, good on you.
This method is designed to be low-stress. Don’t freak out if you forget to do a daily log. Just catch up the next day and do some info dashes to remind you of what you did that day. If you make it a stressful thing, then when you miss a day, you’ll feel bad that you have to do two days worth of stressful things and you’ll want to skip it that much more. The best way to stay consistent is to make your bullet journal a happy place and not beat yourself up about doing it wrong. Cut yourself some slack.
Final Pro-Tip: Make sure to put your name and contact info at the very front of your bullet journal. You wouldn’t want to lose it with no chance of anyone contacting you when they find it, would you?
For more information, go to the official Bullet Journal website. They’ve got a lot of great resources, and you can even buy actual “Bullet Journals” from them.
Everybody does their journals a little differently. My mom likes to get really artsy and color in her Monthly Logs. I rarely draw in my journal. I like bullets and straight lines and consistent formatting (hence my journal’s built-in ruler pouch). It soothes me. I want to hear from you. If you’ve got another type of page that you like to include in your journal that I didn’t mention, show me in the comments or tweet me a picture and I’ll share it with my army of followers (double-digits, baby, awww yeah!).
Thanks again for reading!
Author: Ryan Palo | Tags: productivity bullet-journal | Buy me a coffee
Like my stuff? Have questions or feedback for me? Want to mentor me or get my help with something? Get in touch! To stay updated, subscribe via RSS